Check out my newest product on my site… Cookies and Cream cupcakes! They have Oreo cookies within the batter and at the base of the cupcake. mhmmmmm absolutely delicious!!


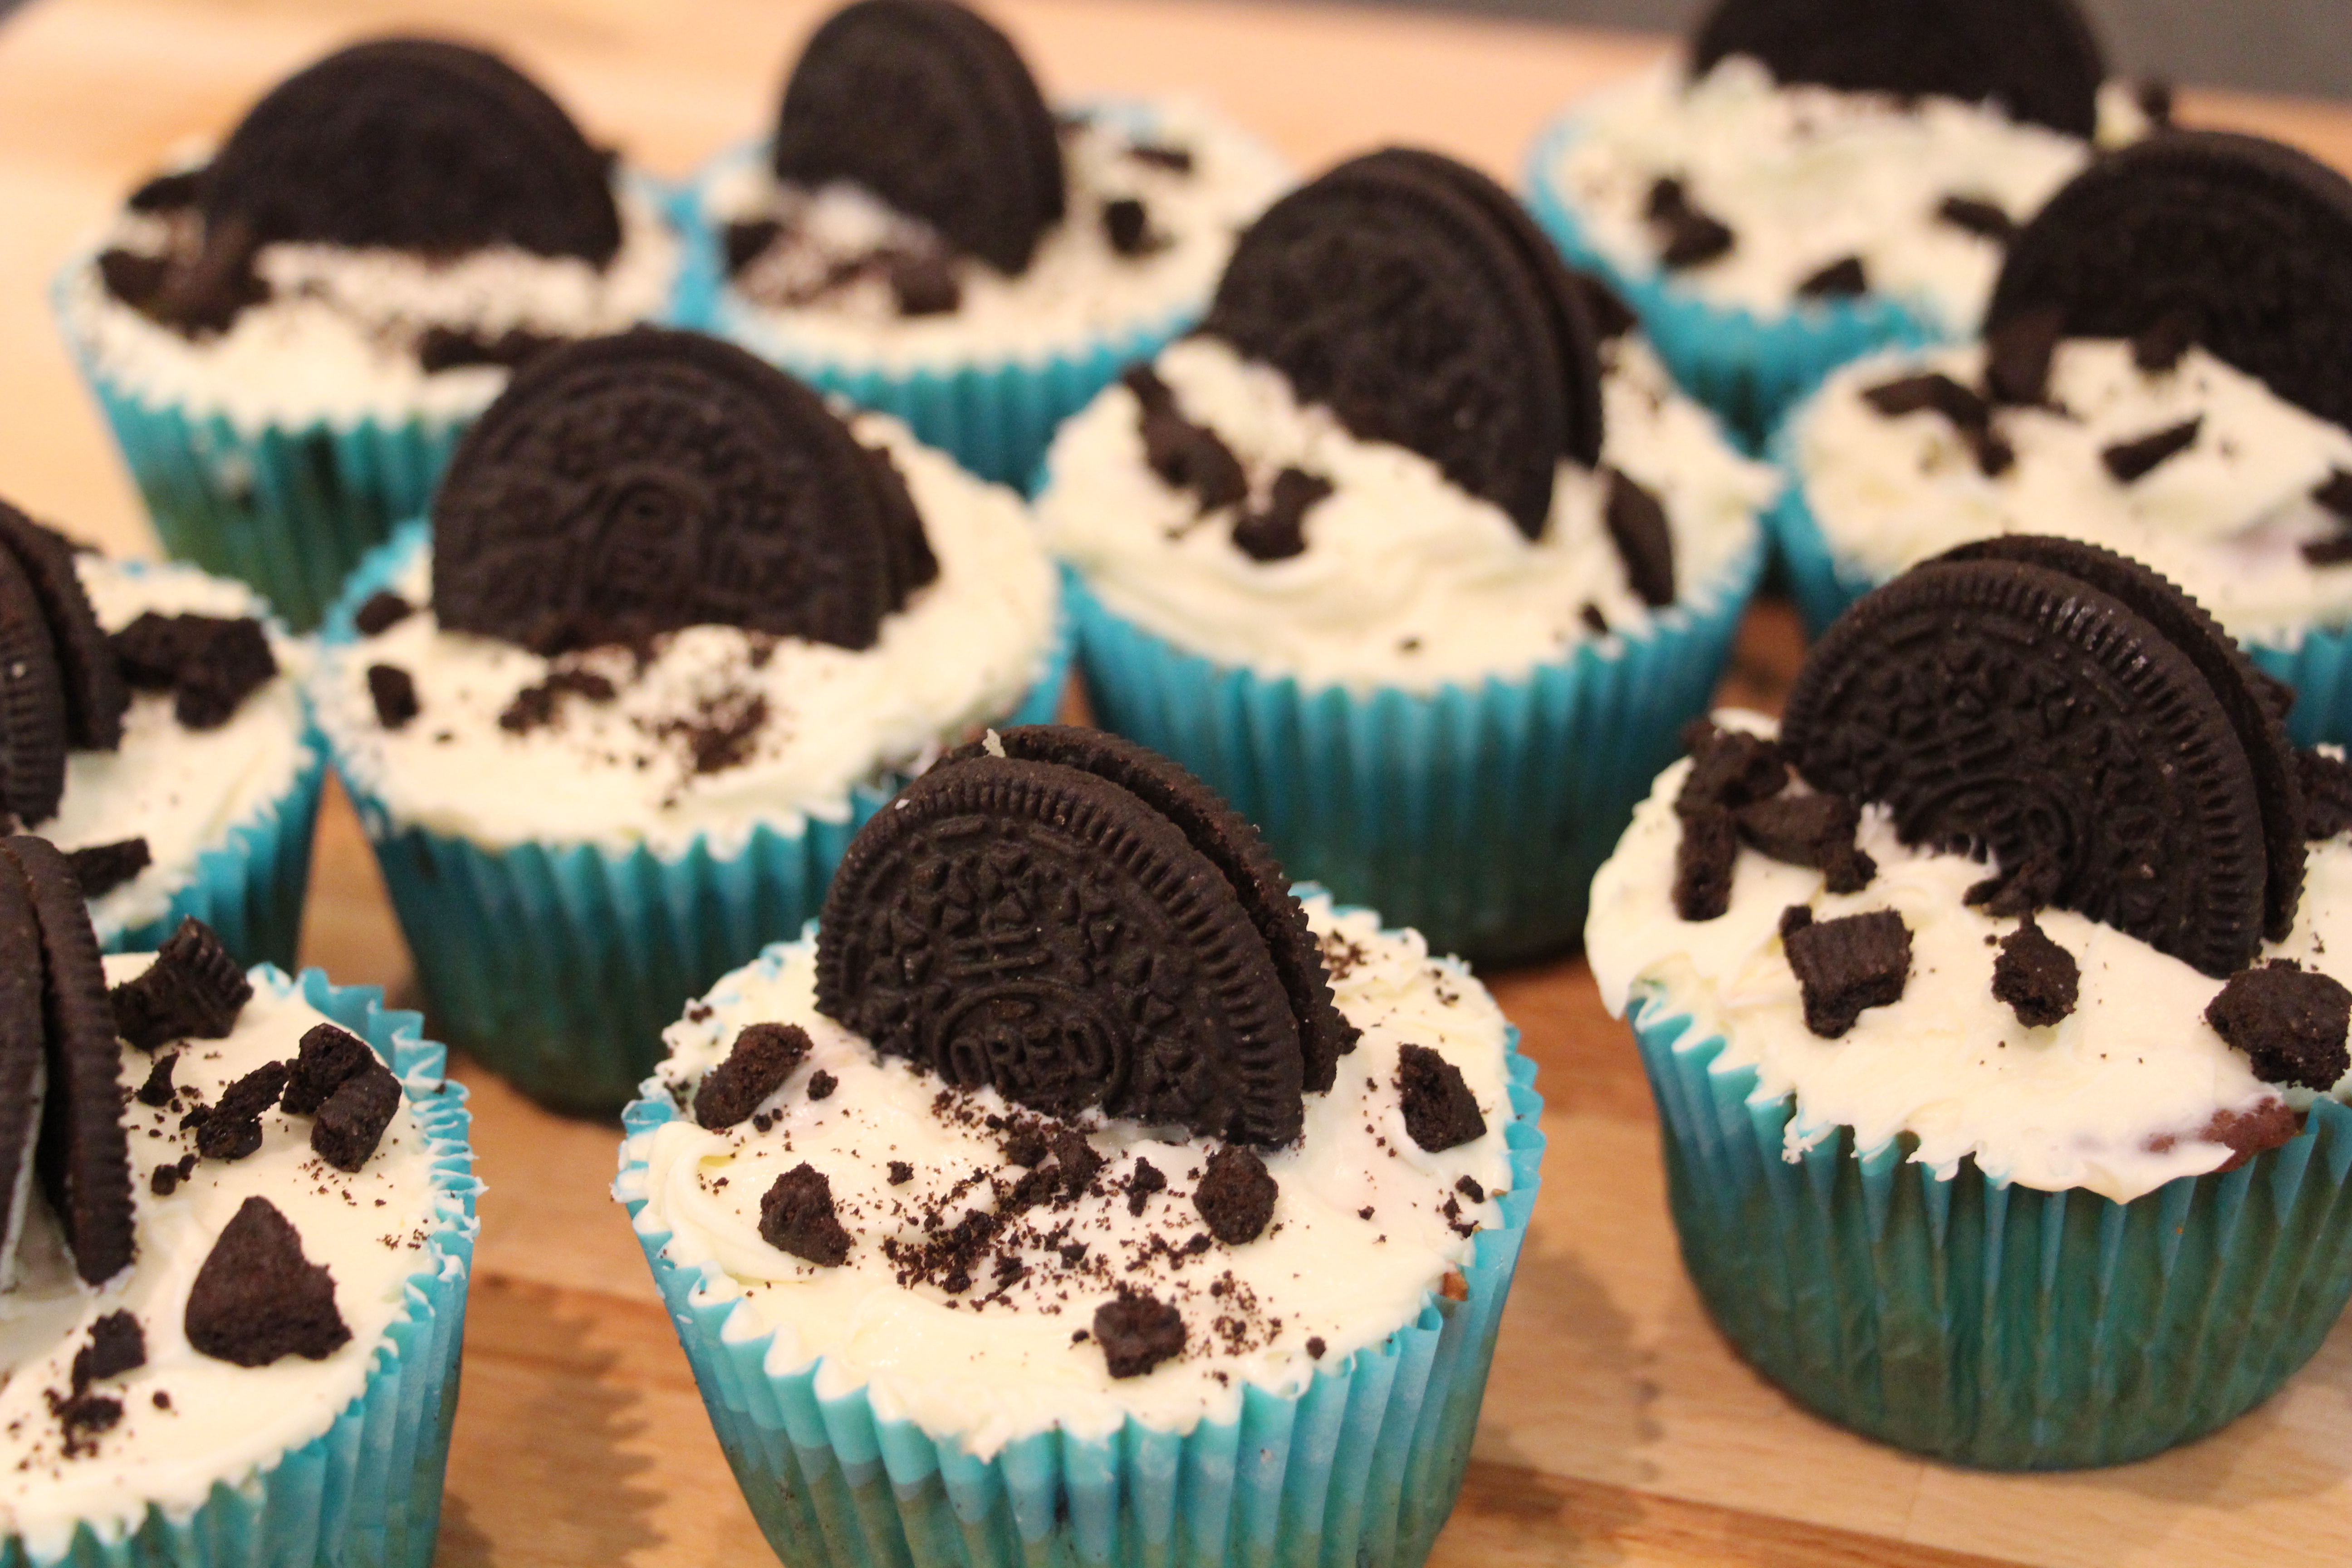

Check out my newest product on my site… Cookies and Cream cupcakes! They have Oreo cookies within the batter and at the base of the cupcake. mhmmmmm absolutely delicious!!
So… It was my friend’s 30th Birthday at work and I was trying to think of what I could make her that would be a surprise. Then I remembered that she loved my cookies and my chocolate cake so I thought I would combine the two!
I made these babies which have a cookie at the bottom of the cup, chocolate cake in the middle and a little circle of cookie in the middle. I’ve never done this before but my recipe worked perfectly! So the cupcakes texture was really unique, it had a crunch but a soft moist middle. My friend was VERY happy!
This is what they looked like before I put the vanilla icing with chocolate sprinkles.


And, the final product!
I made these very simple cupcakes for a baby shower and I think they are so cute! First time I’ve used rice paper and I really think they look cute. Only thing I fell on was that the buttercream icing dried so quickly, I had to use more to stick them on!

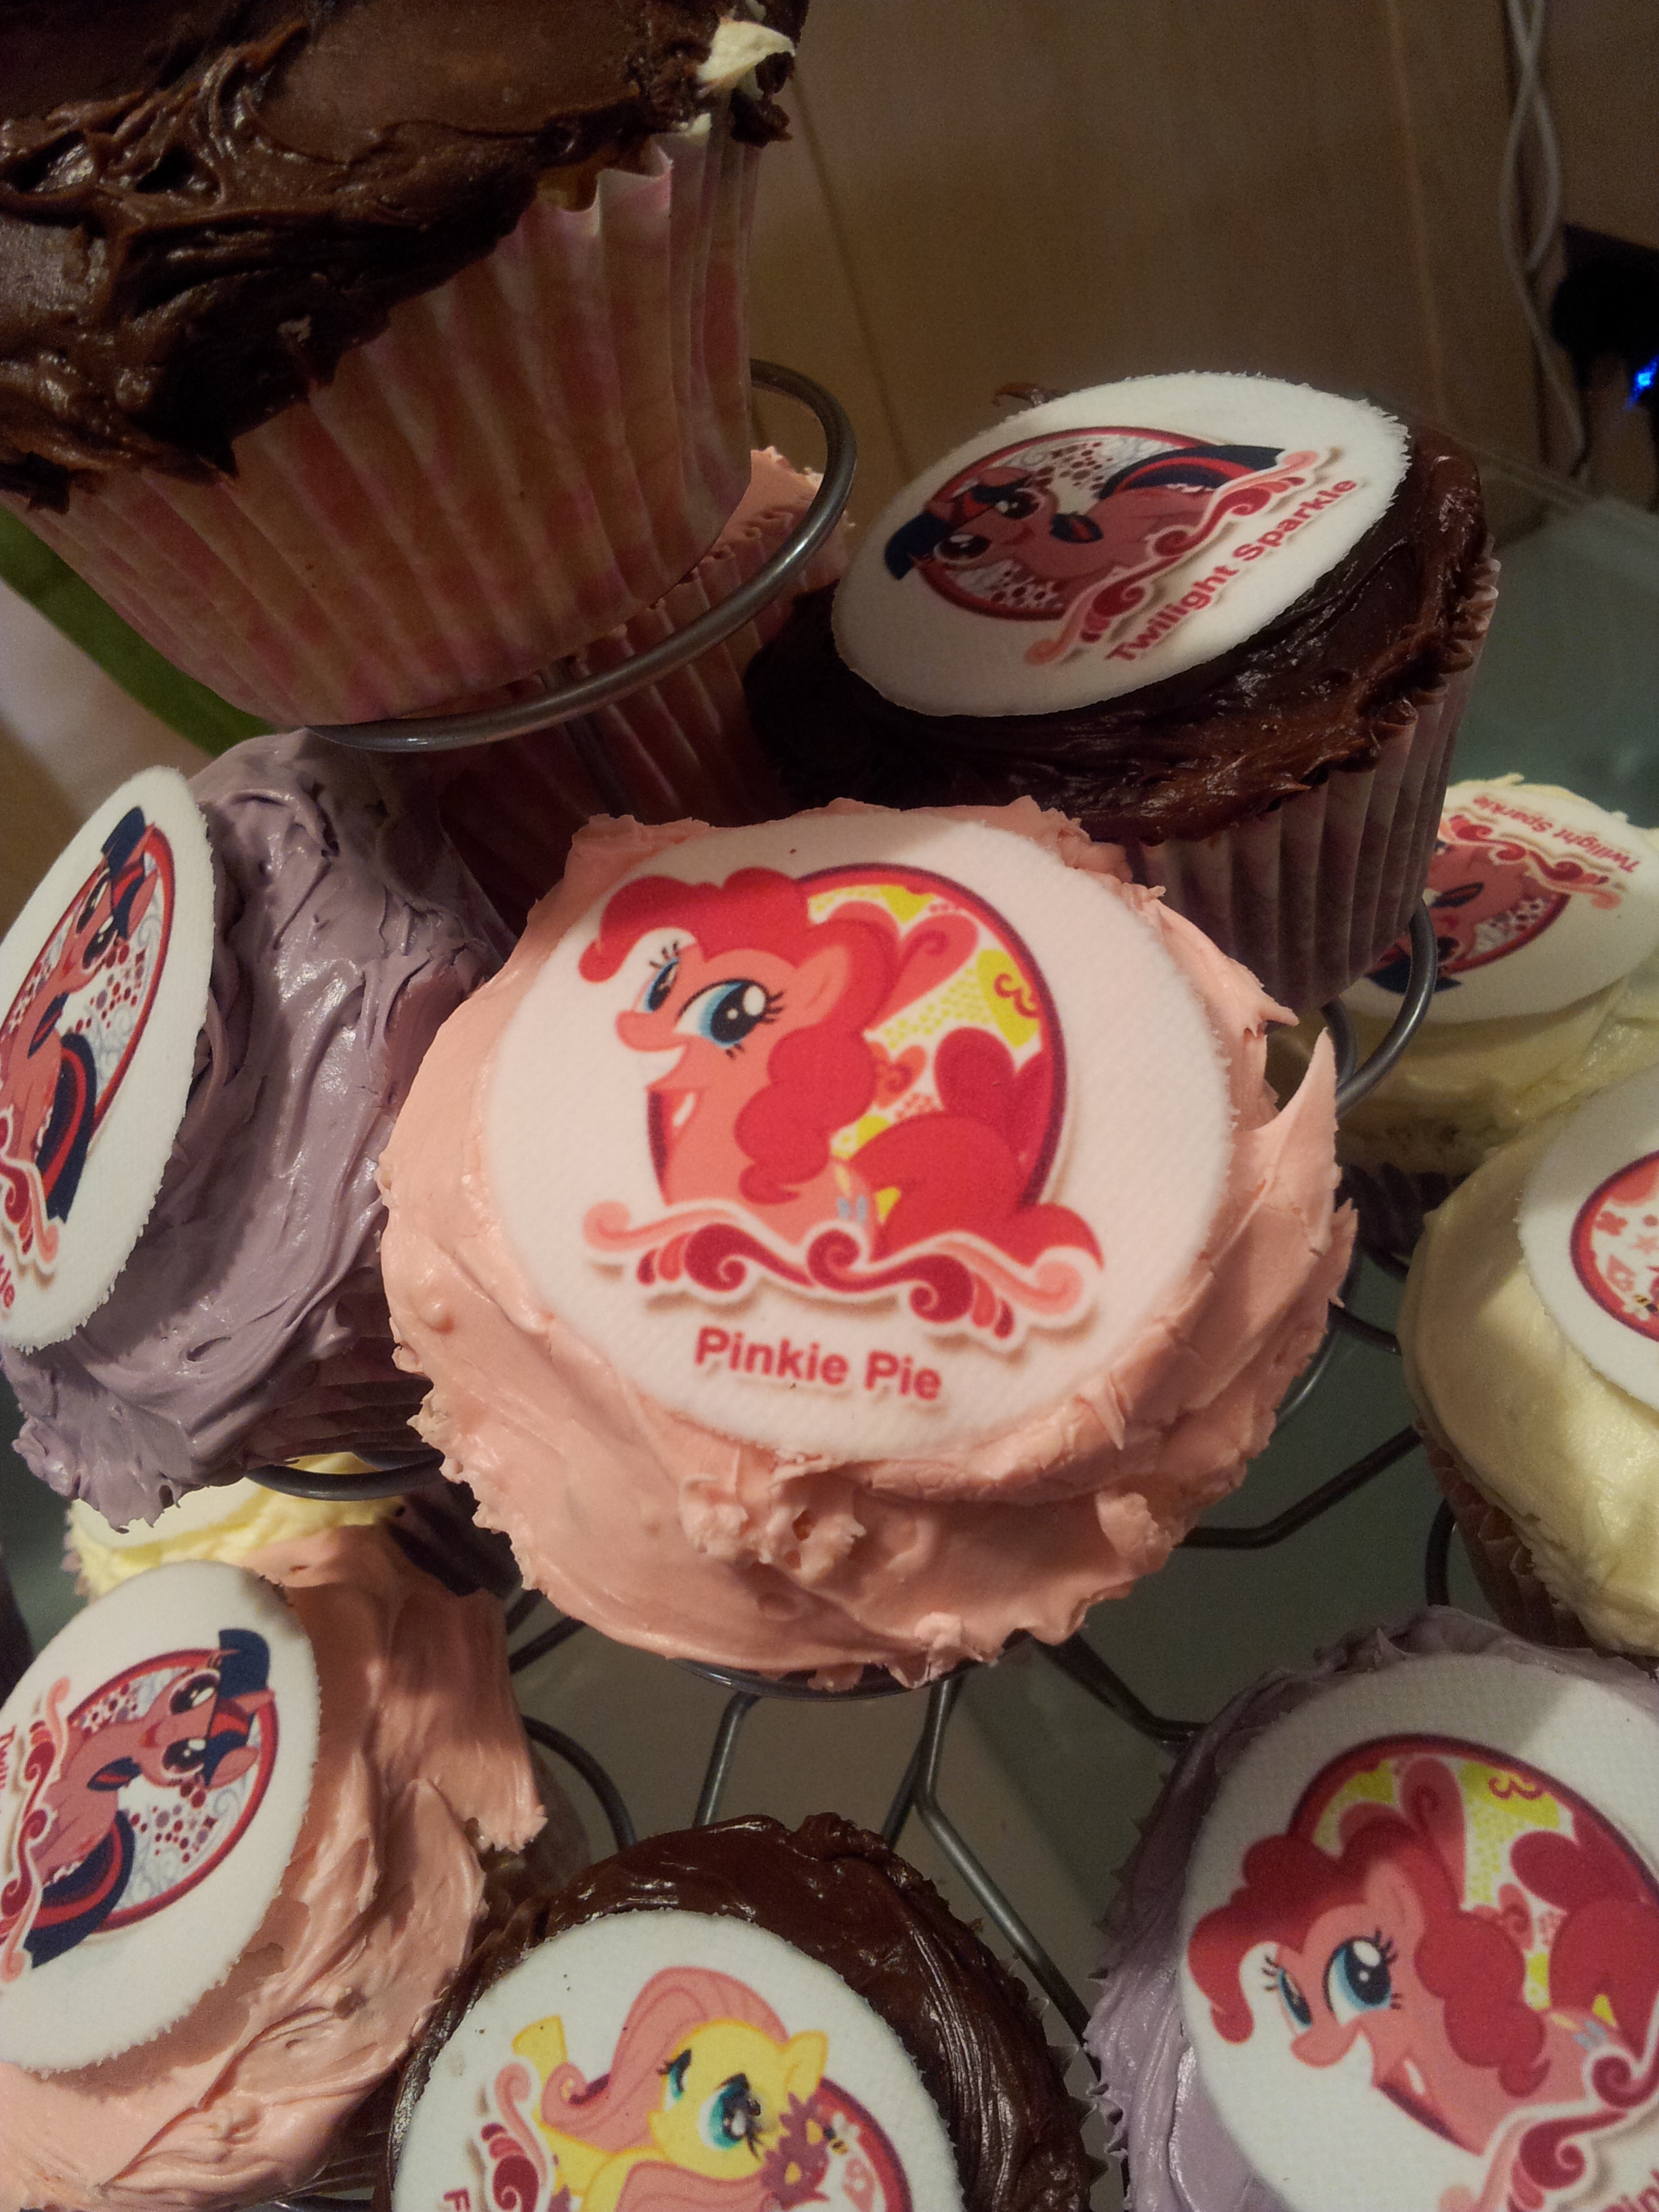
Here are the cupcakes I made before the Pony pictures were put on. They are a mix of chocolate and vanilla cakes and with white, purple and pink icing.
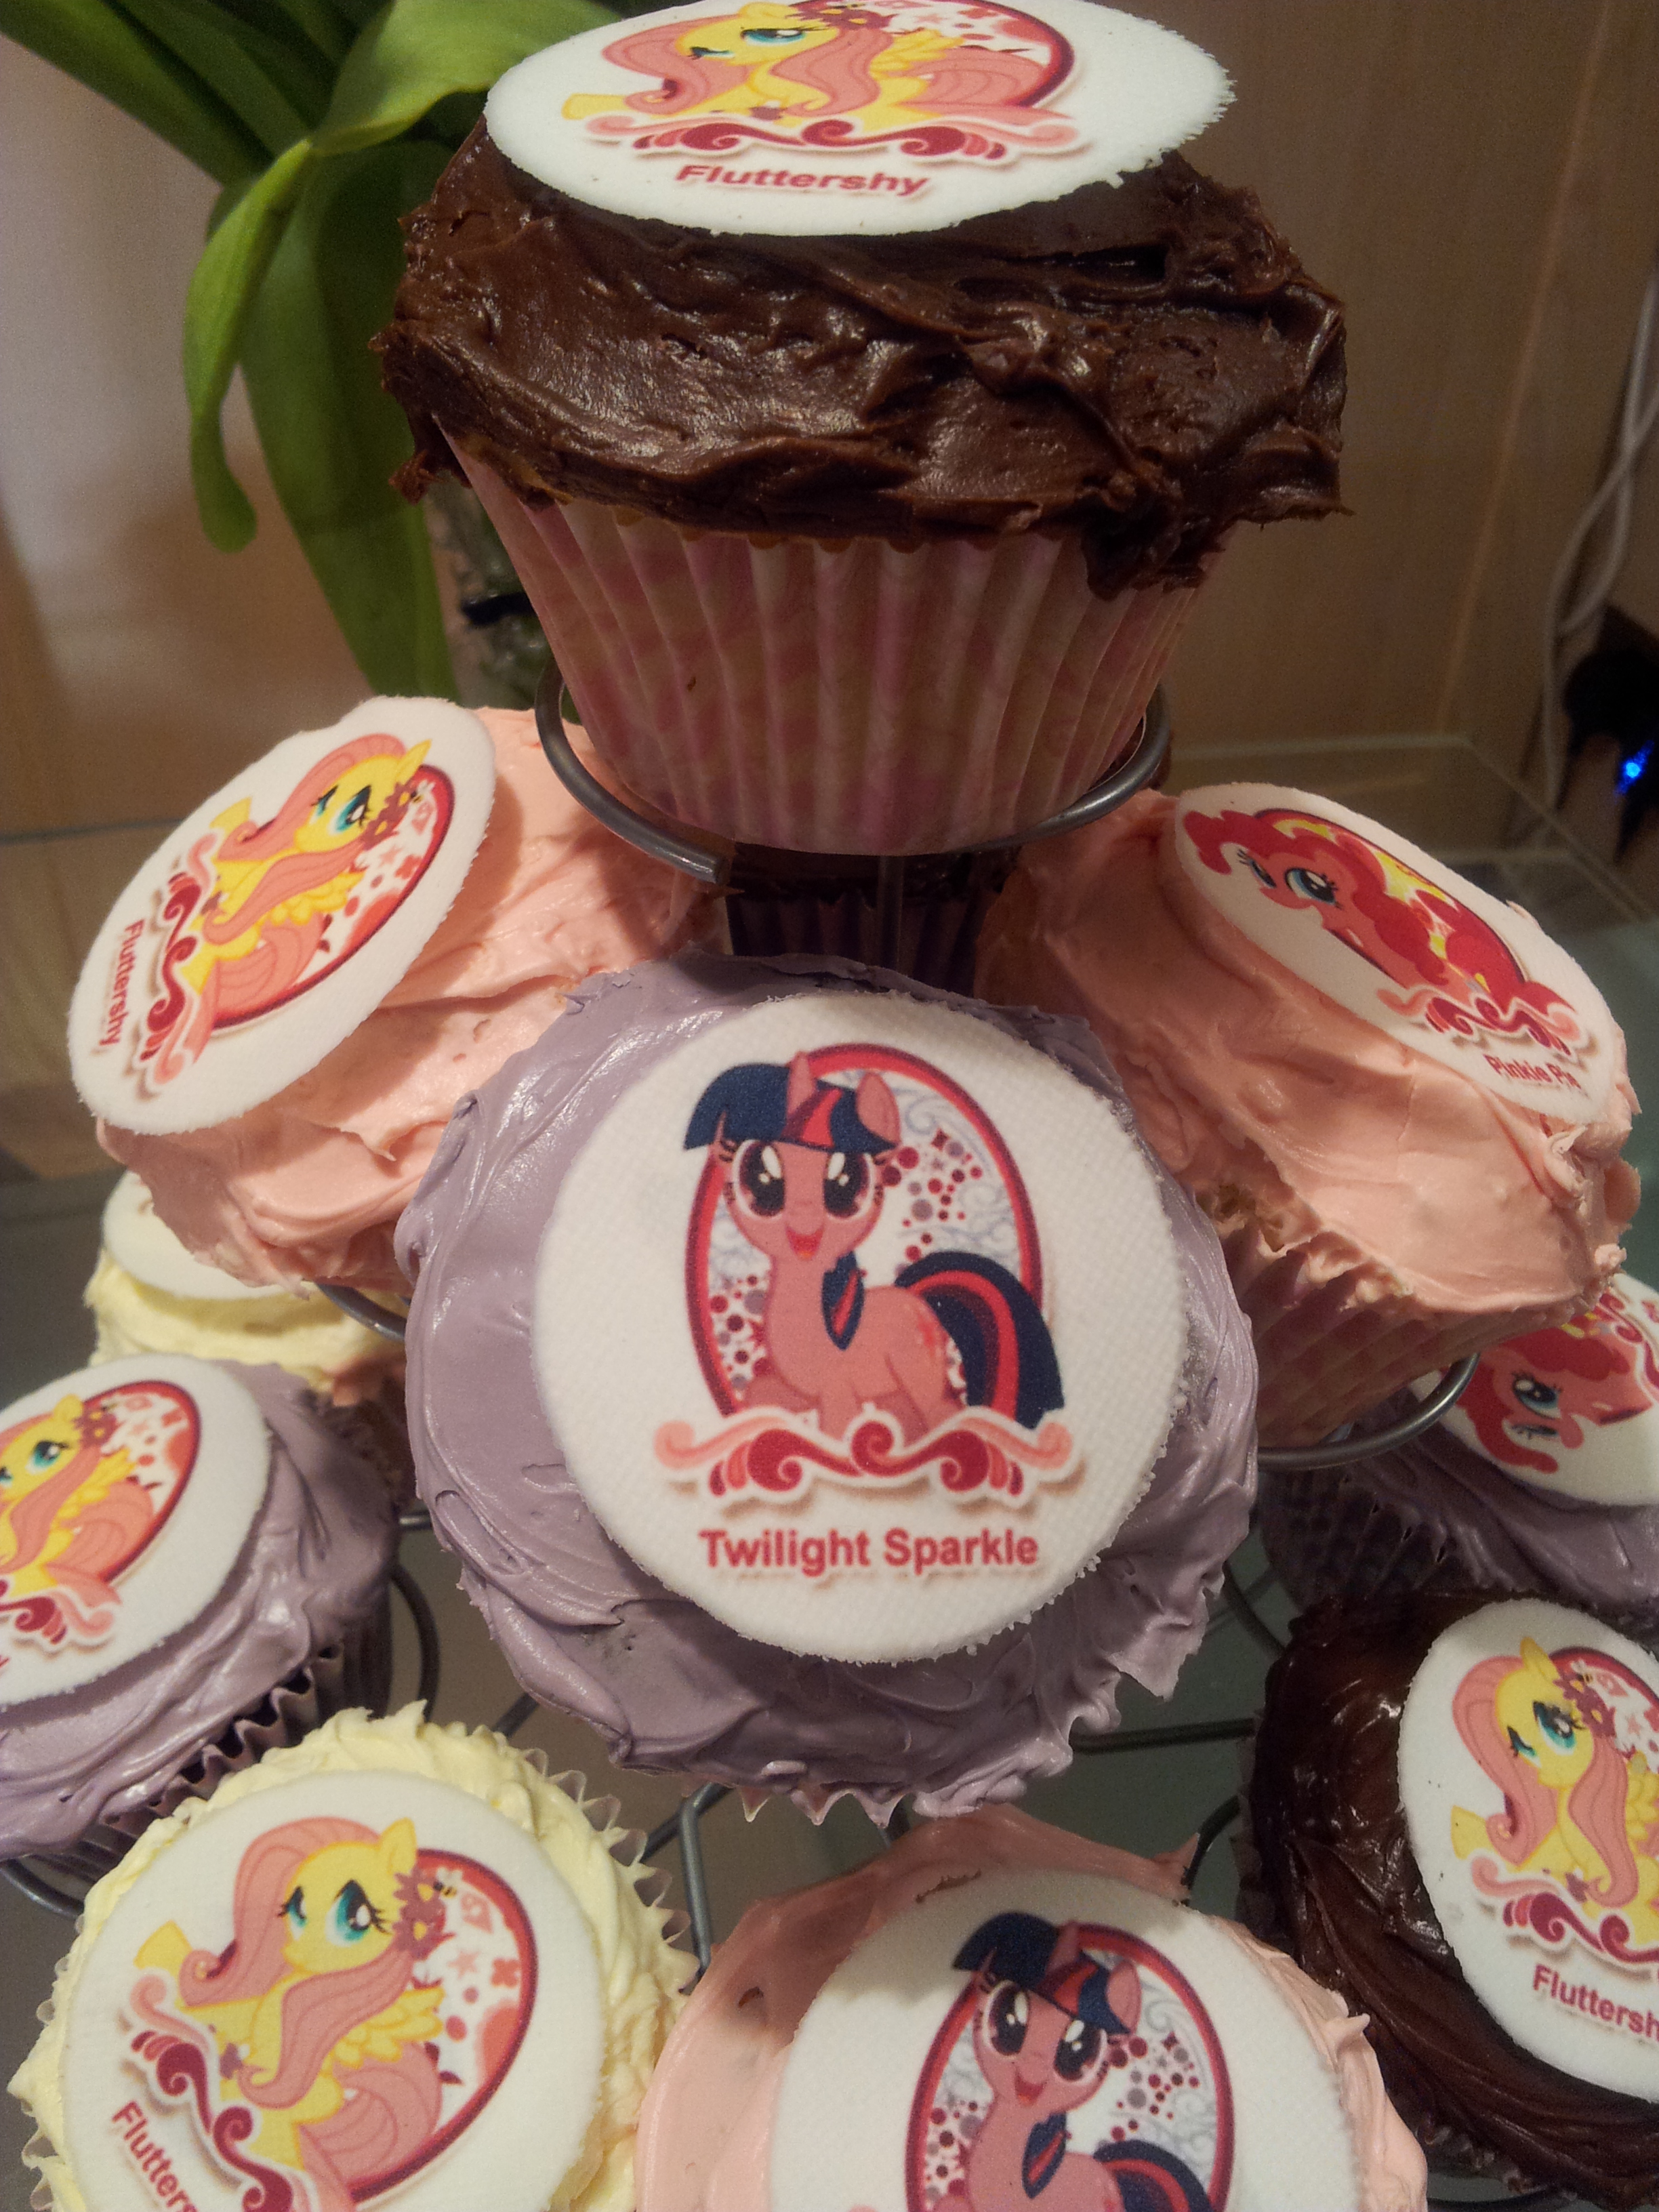 And now with the rice paper attached to this!
 And I thought I would just put a little picture of what the finished product looked like!! 🙂

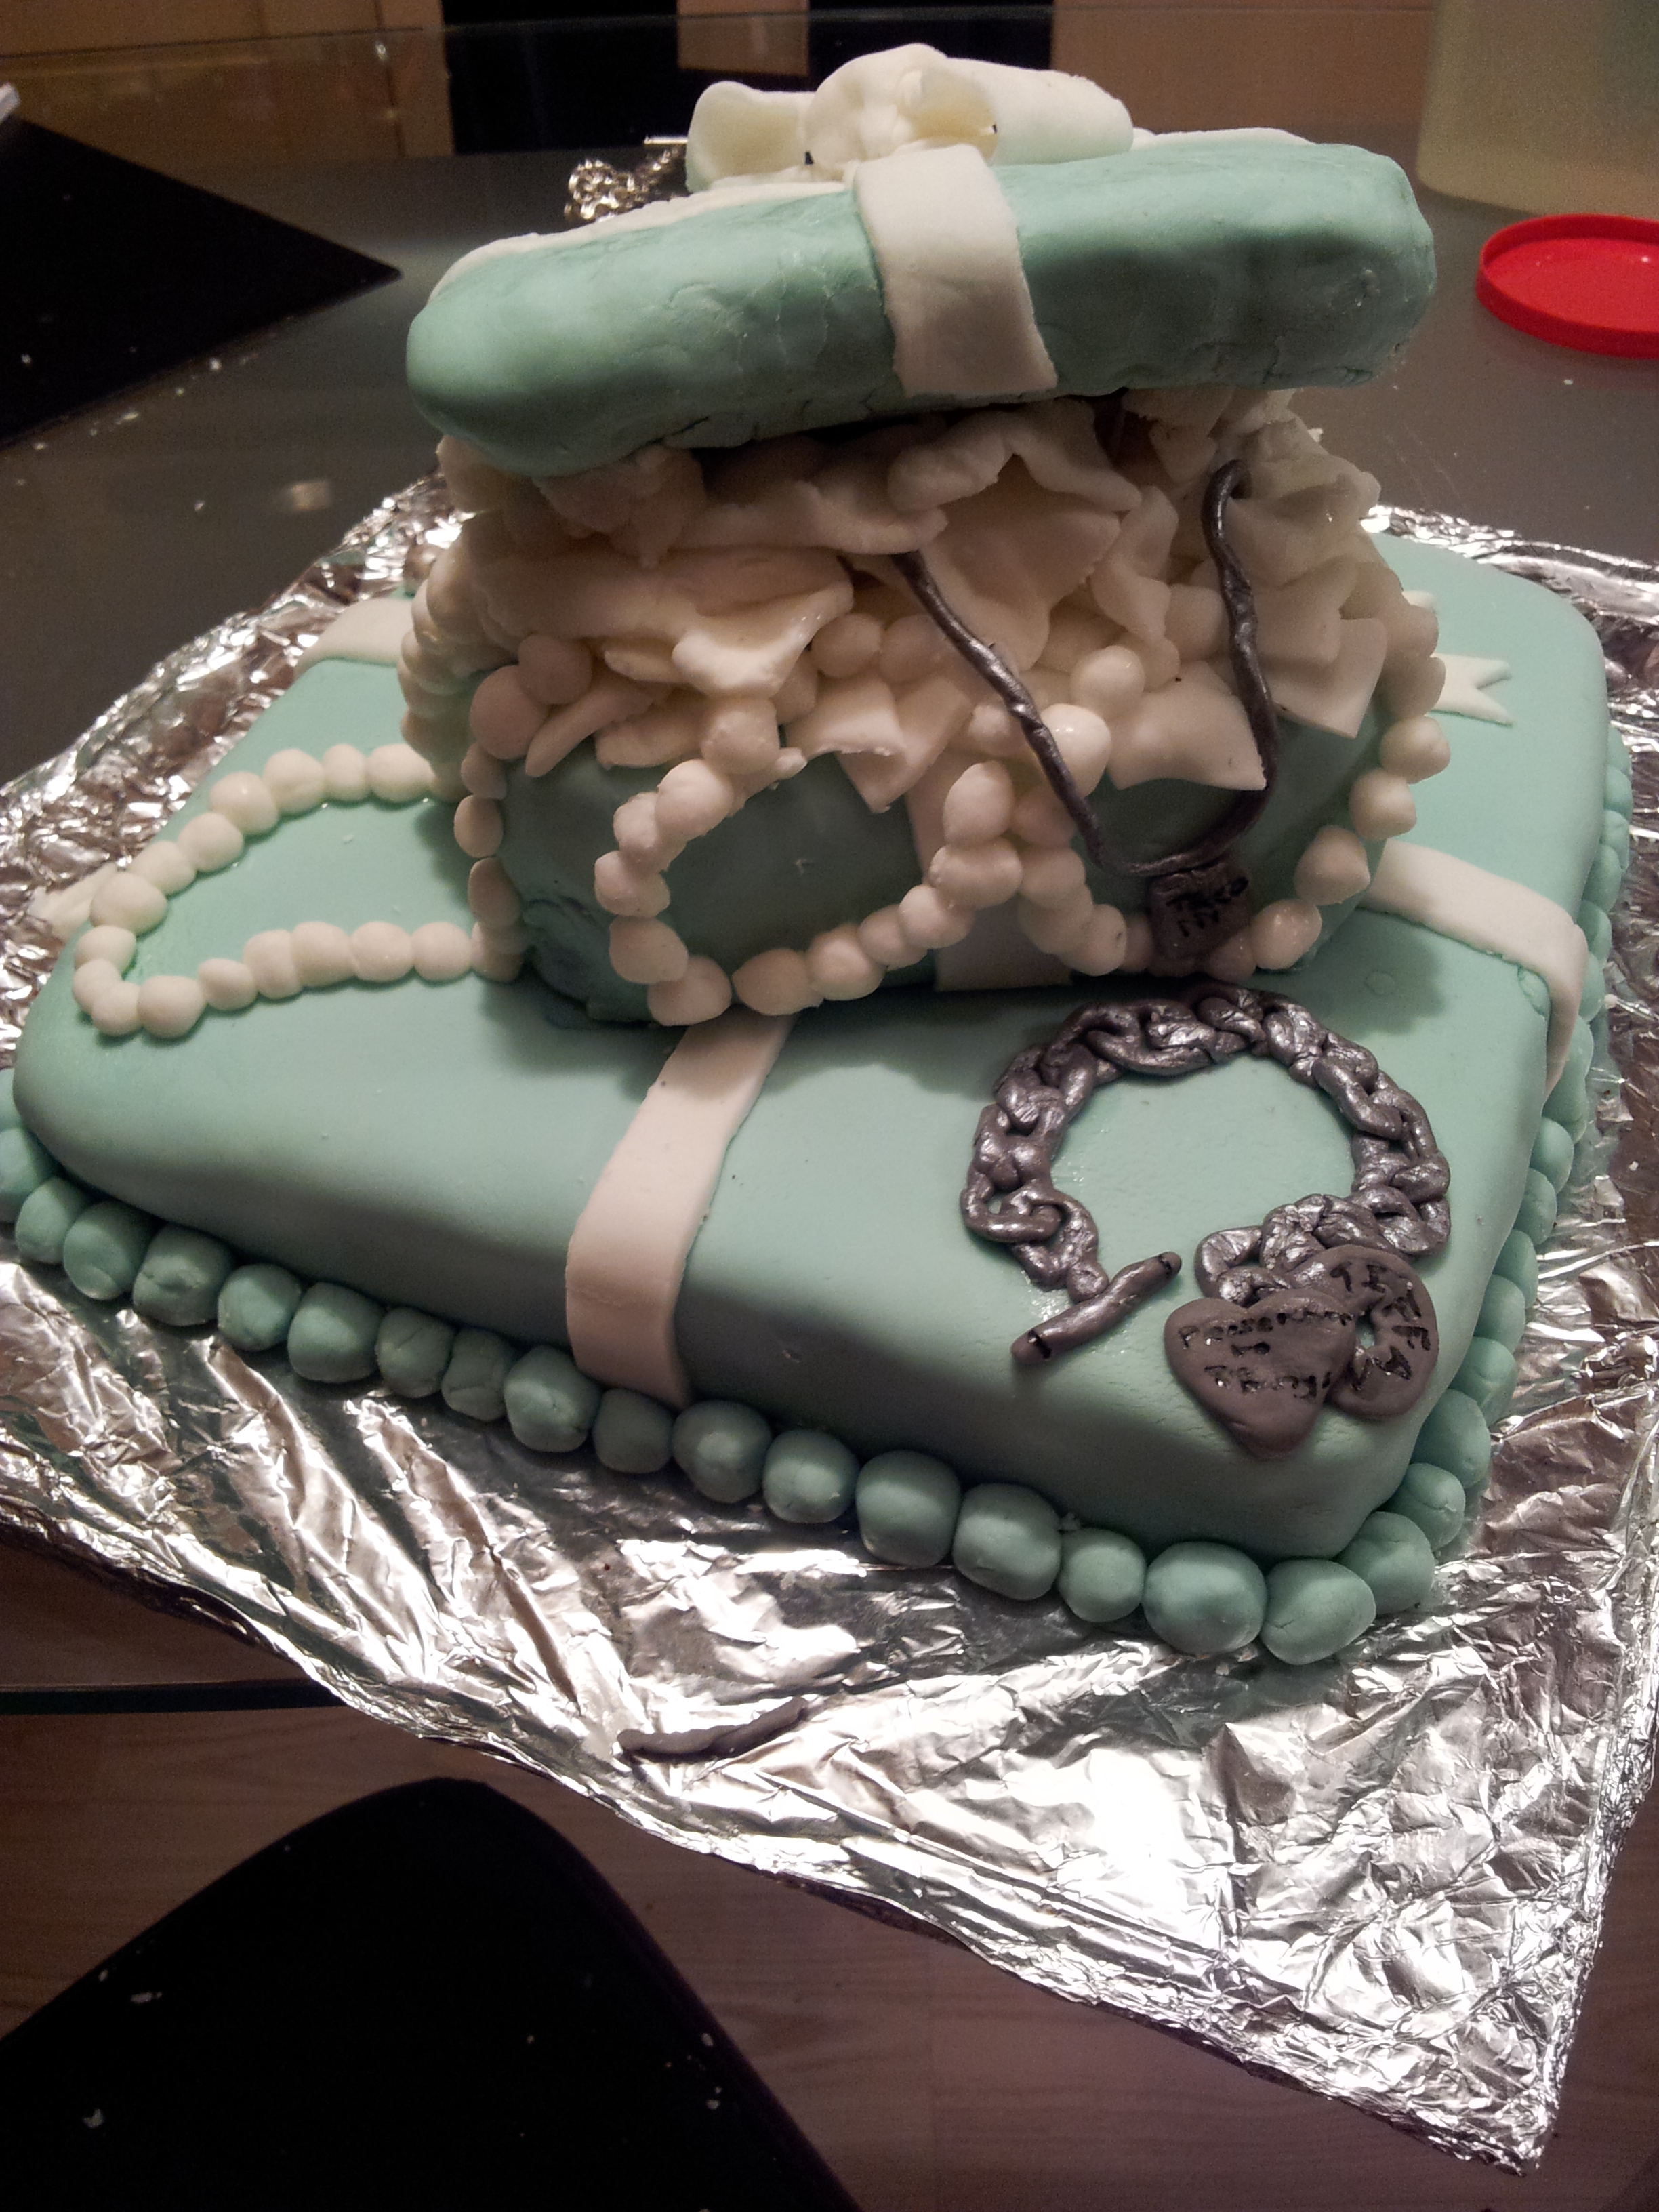
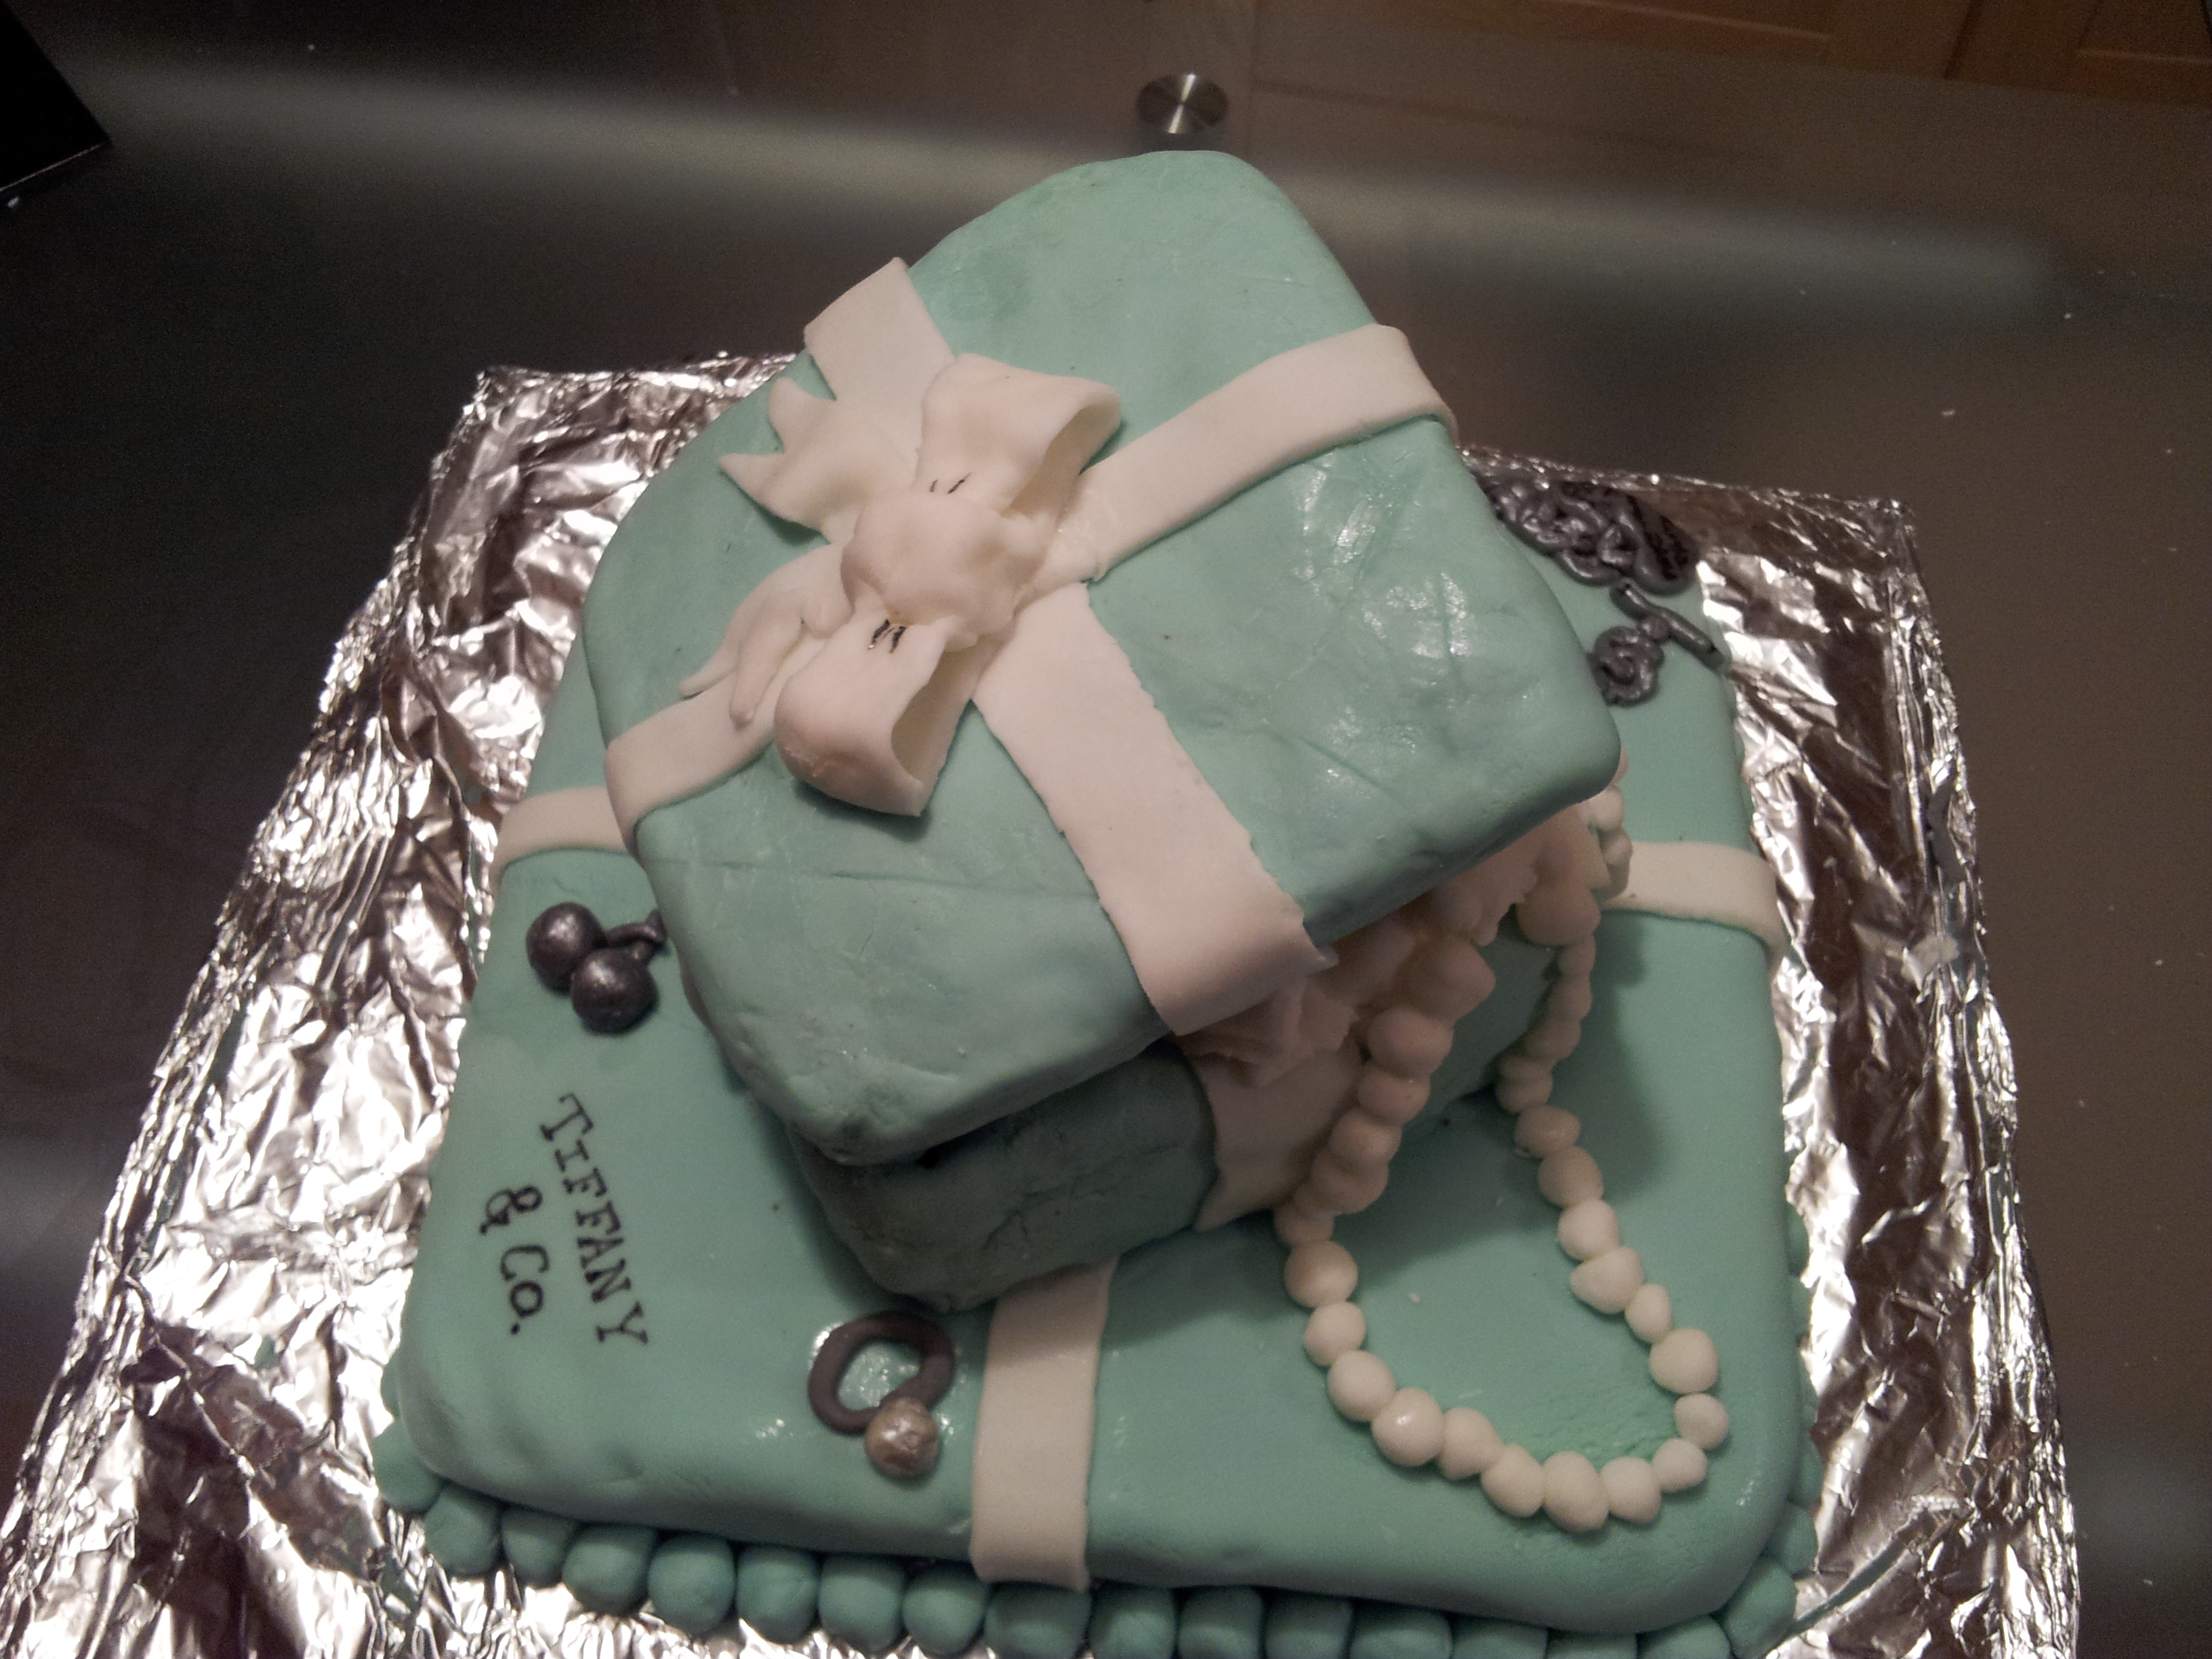
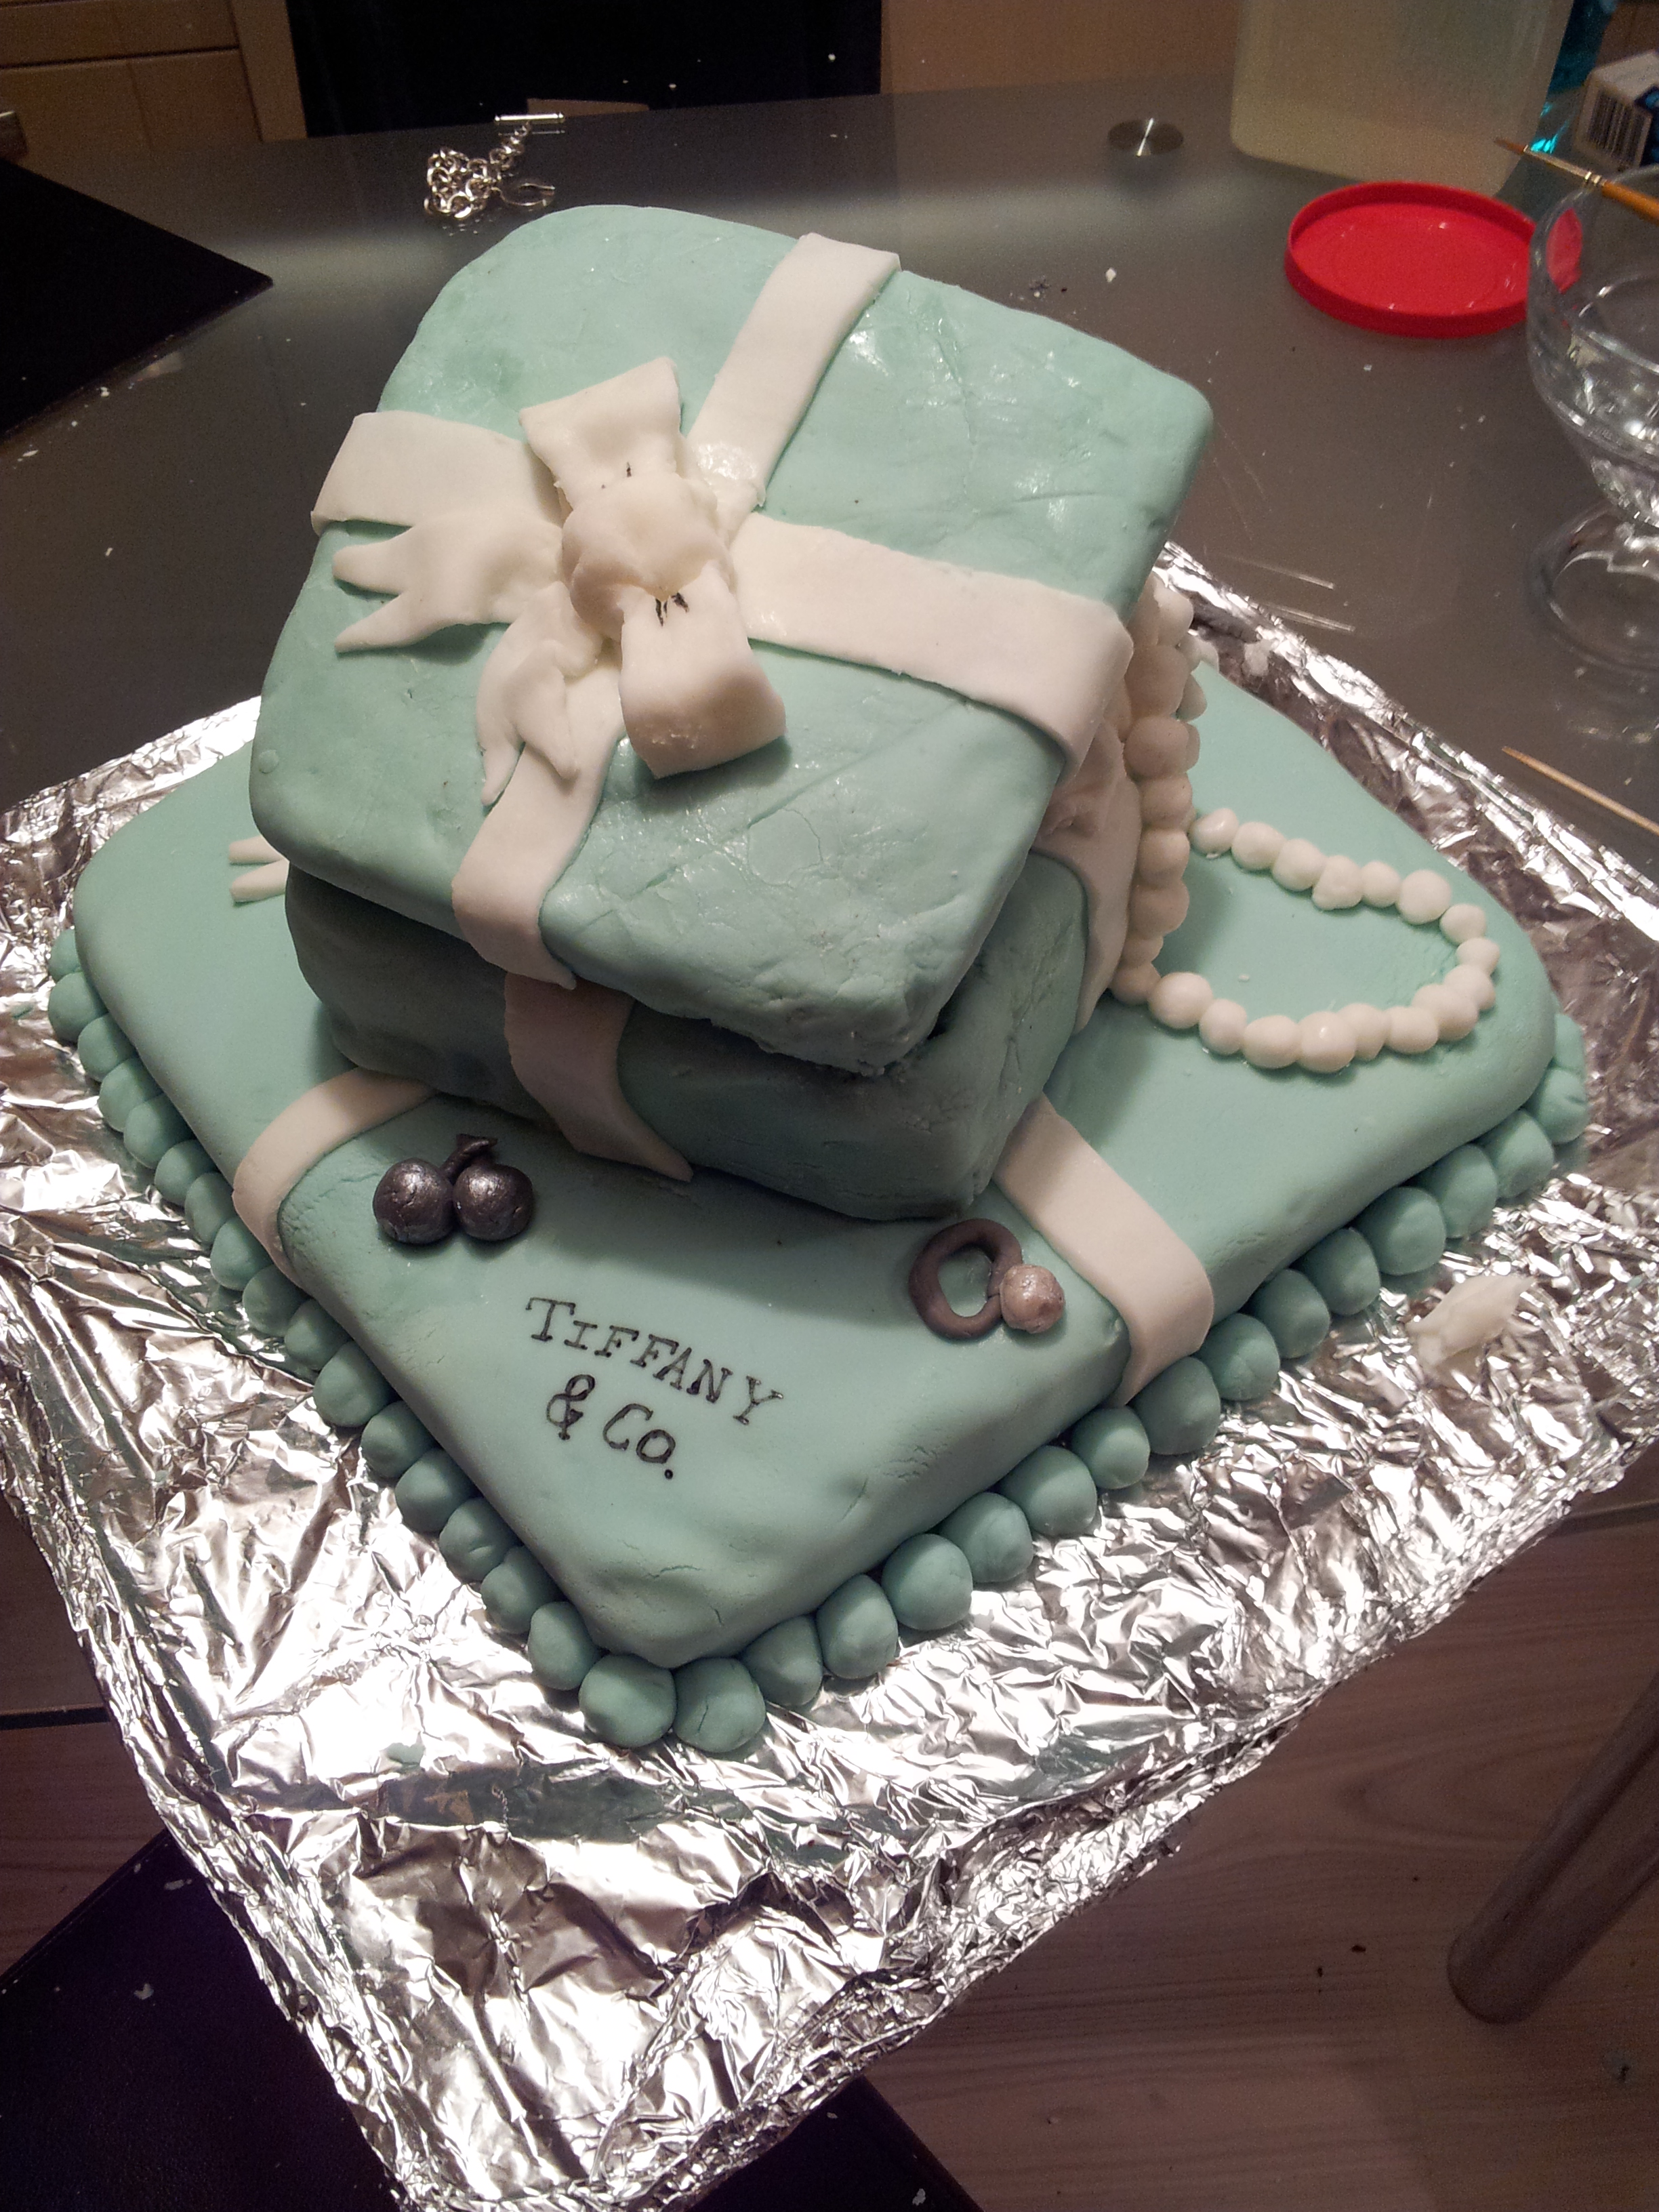
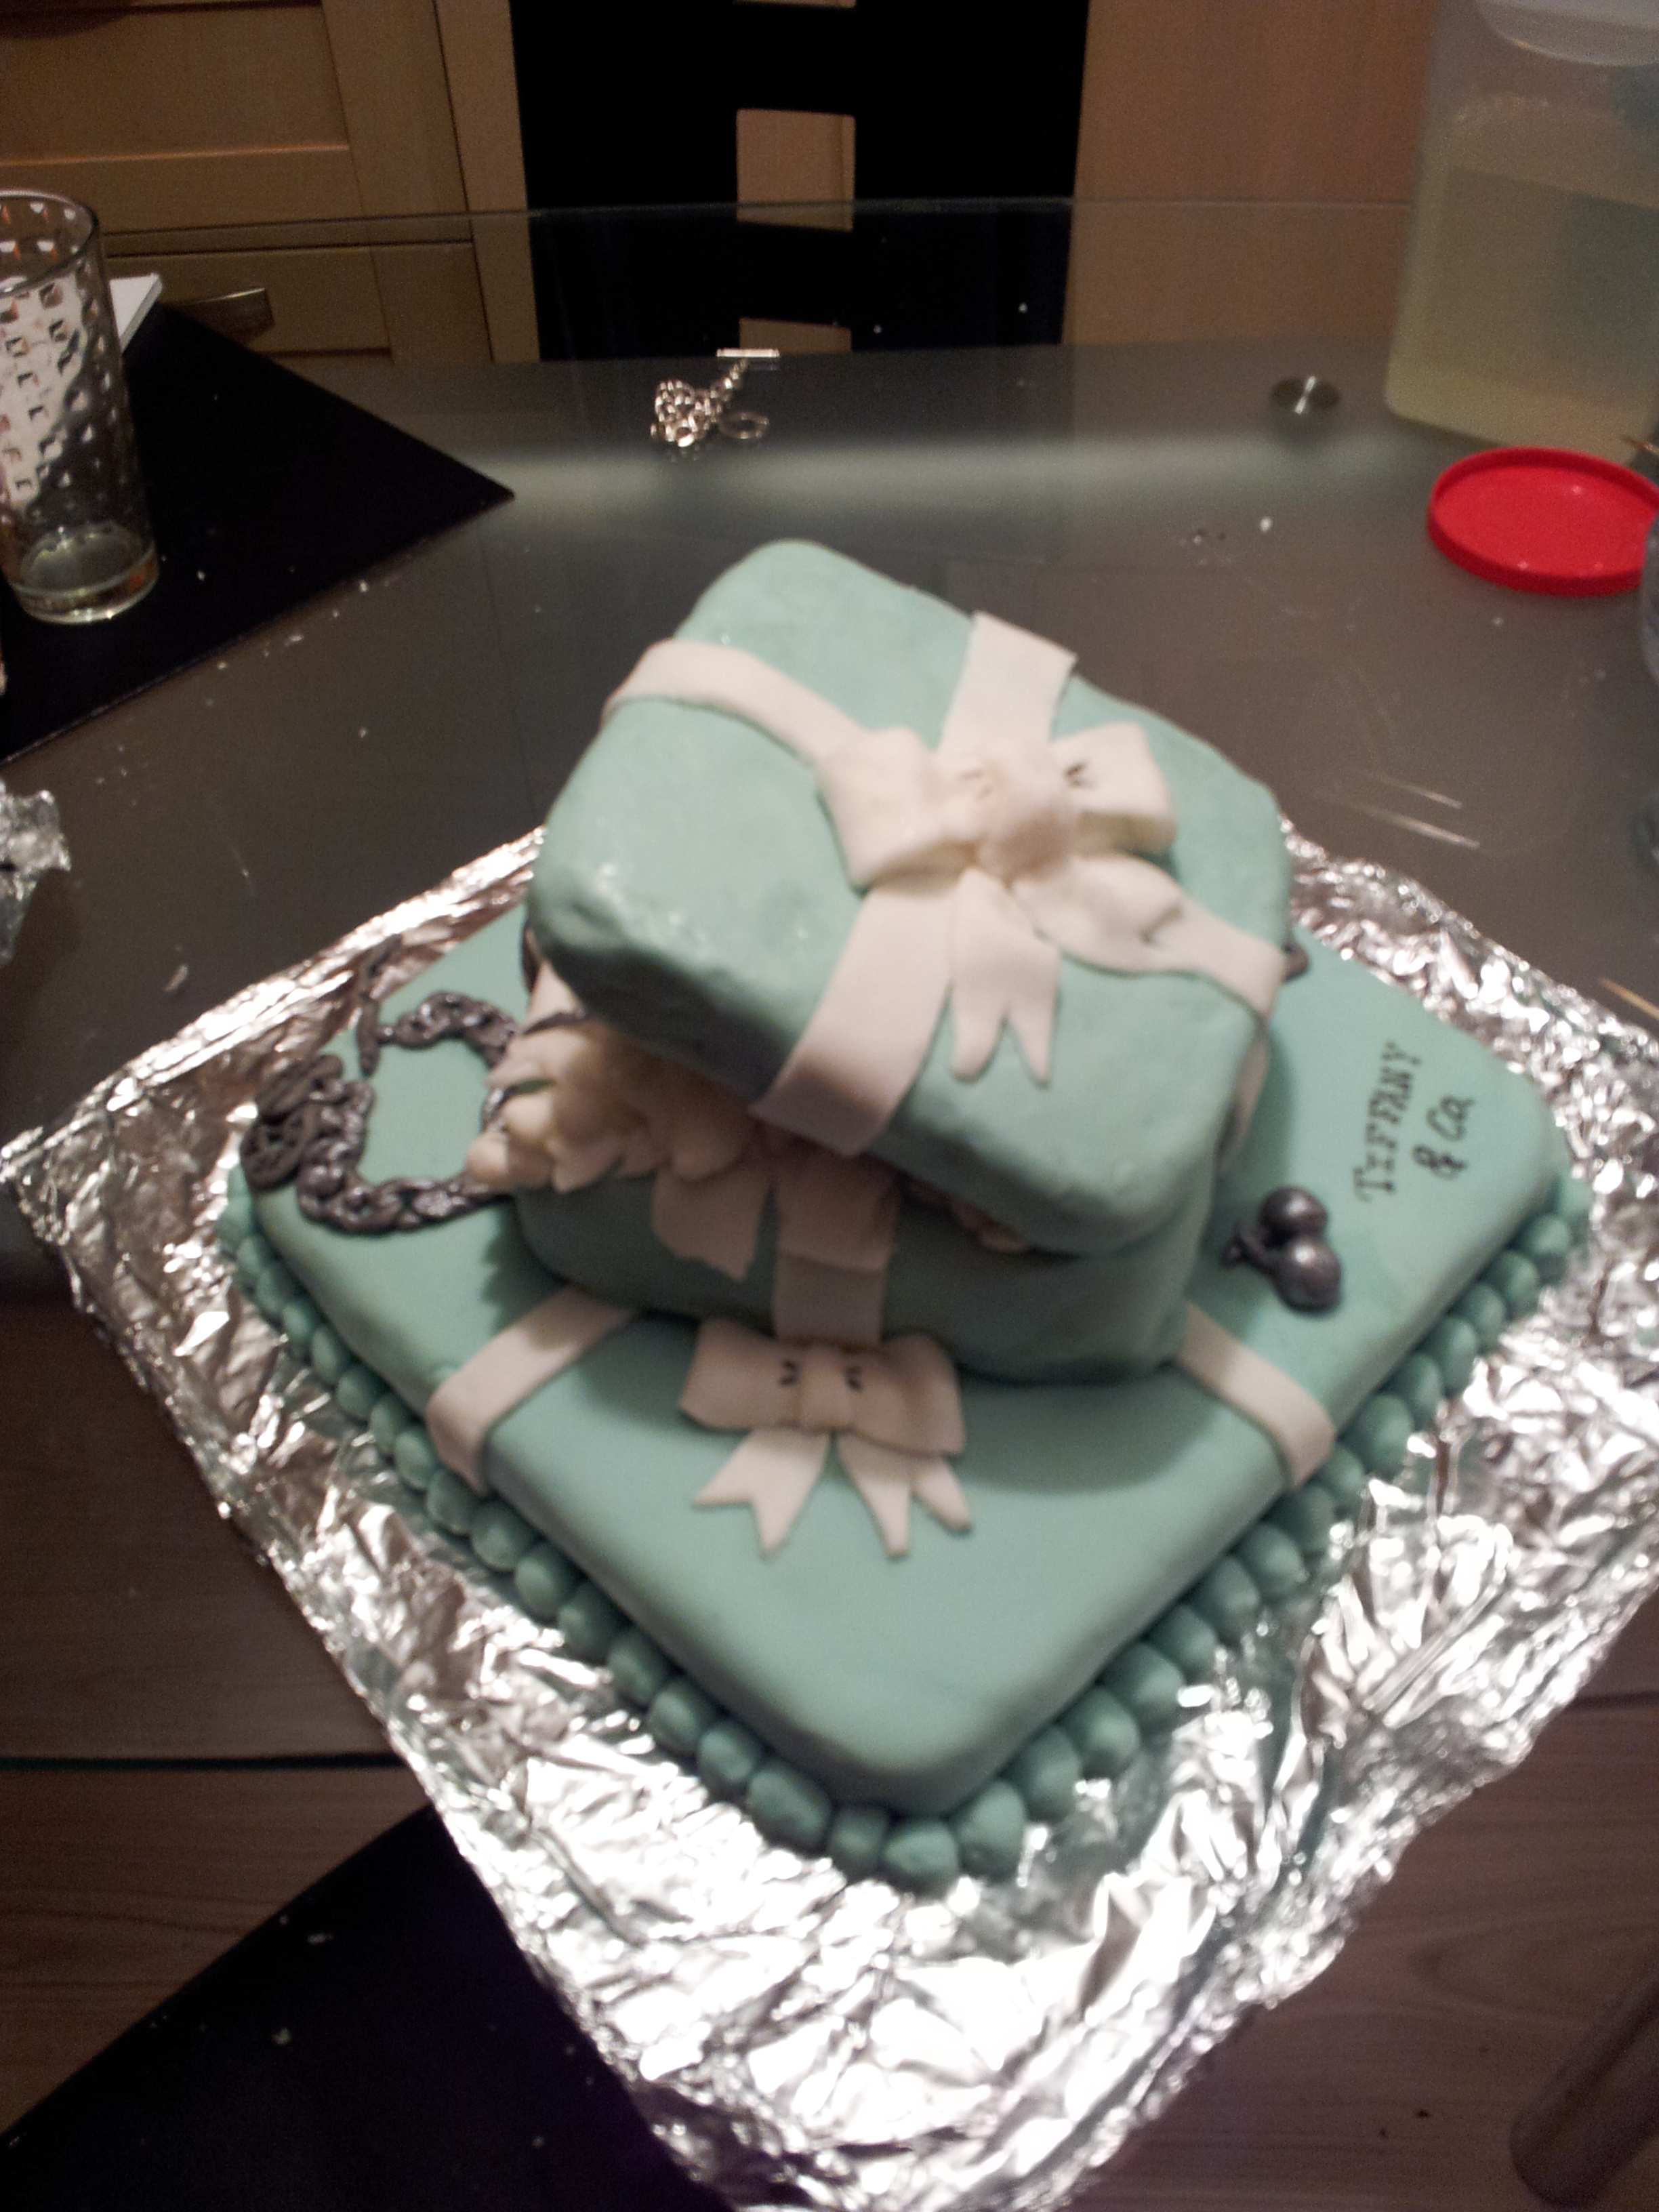
This Tiffany cake took about 4 hours to make but it was totally worth it!! The thing that actually took the most time was creating the Tiffany Blue Colour.
I’m not sure about the US, but in the UK it’s hard to find Teal coloured fondant so I had to need the colour in using blue and green food colouring. And to ensure the whole cake was the same shade I had to do this in stages…. I actually worked my arm muscles so much that they hurt for two days!! Crazy.
I decided that I wanted to make it multi dimensional so I made the treasure chest open and used shredded fondant to make it look like tissue paper. I then looked at Tiffany products and modelled each piece of jewellery on this.
I used Grey fondant for the silver jewellery and then painted it with silver to give it that shine.
To create the logos I just got a thin edible pen and very slowly copied the photo.
I must admit I’m proud of the bows, it’s the first time i’ve done bows with fondant and I was very happy with the way they came out.
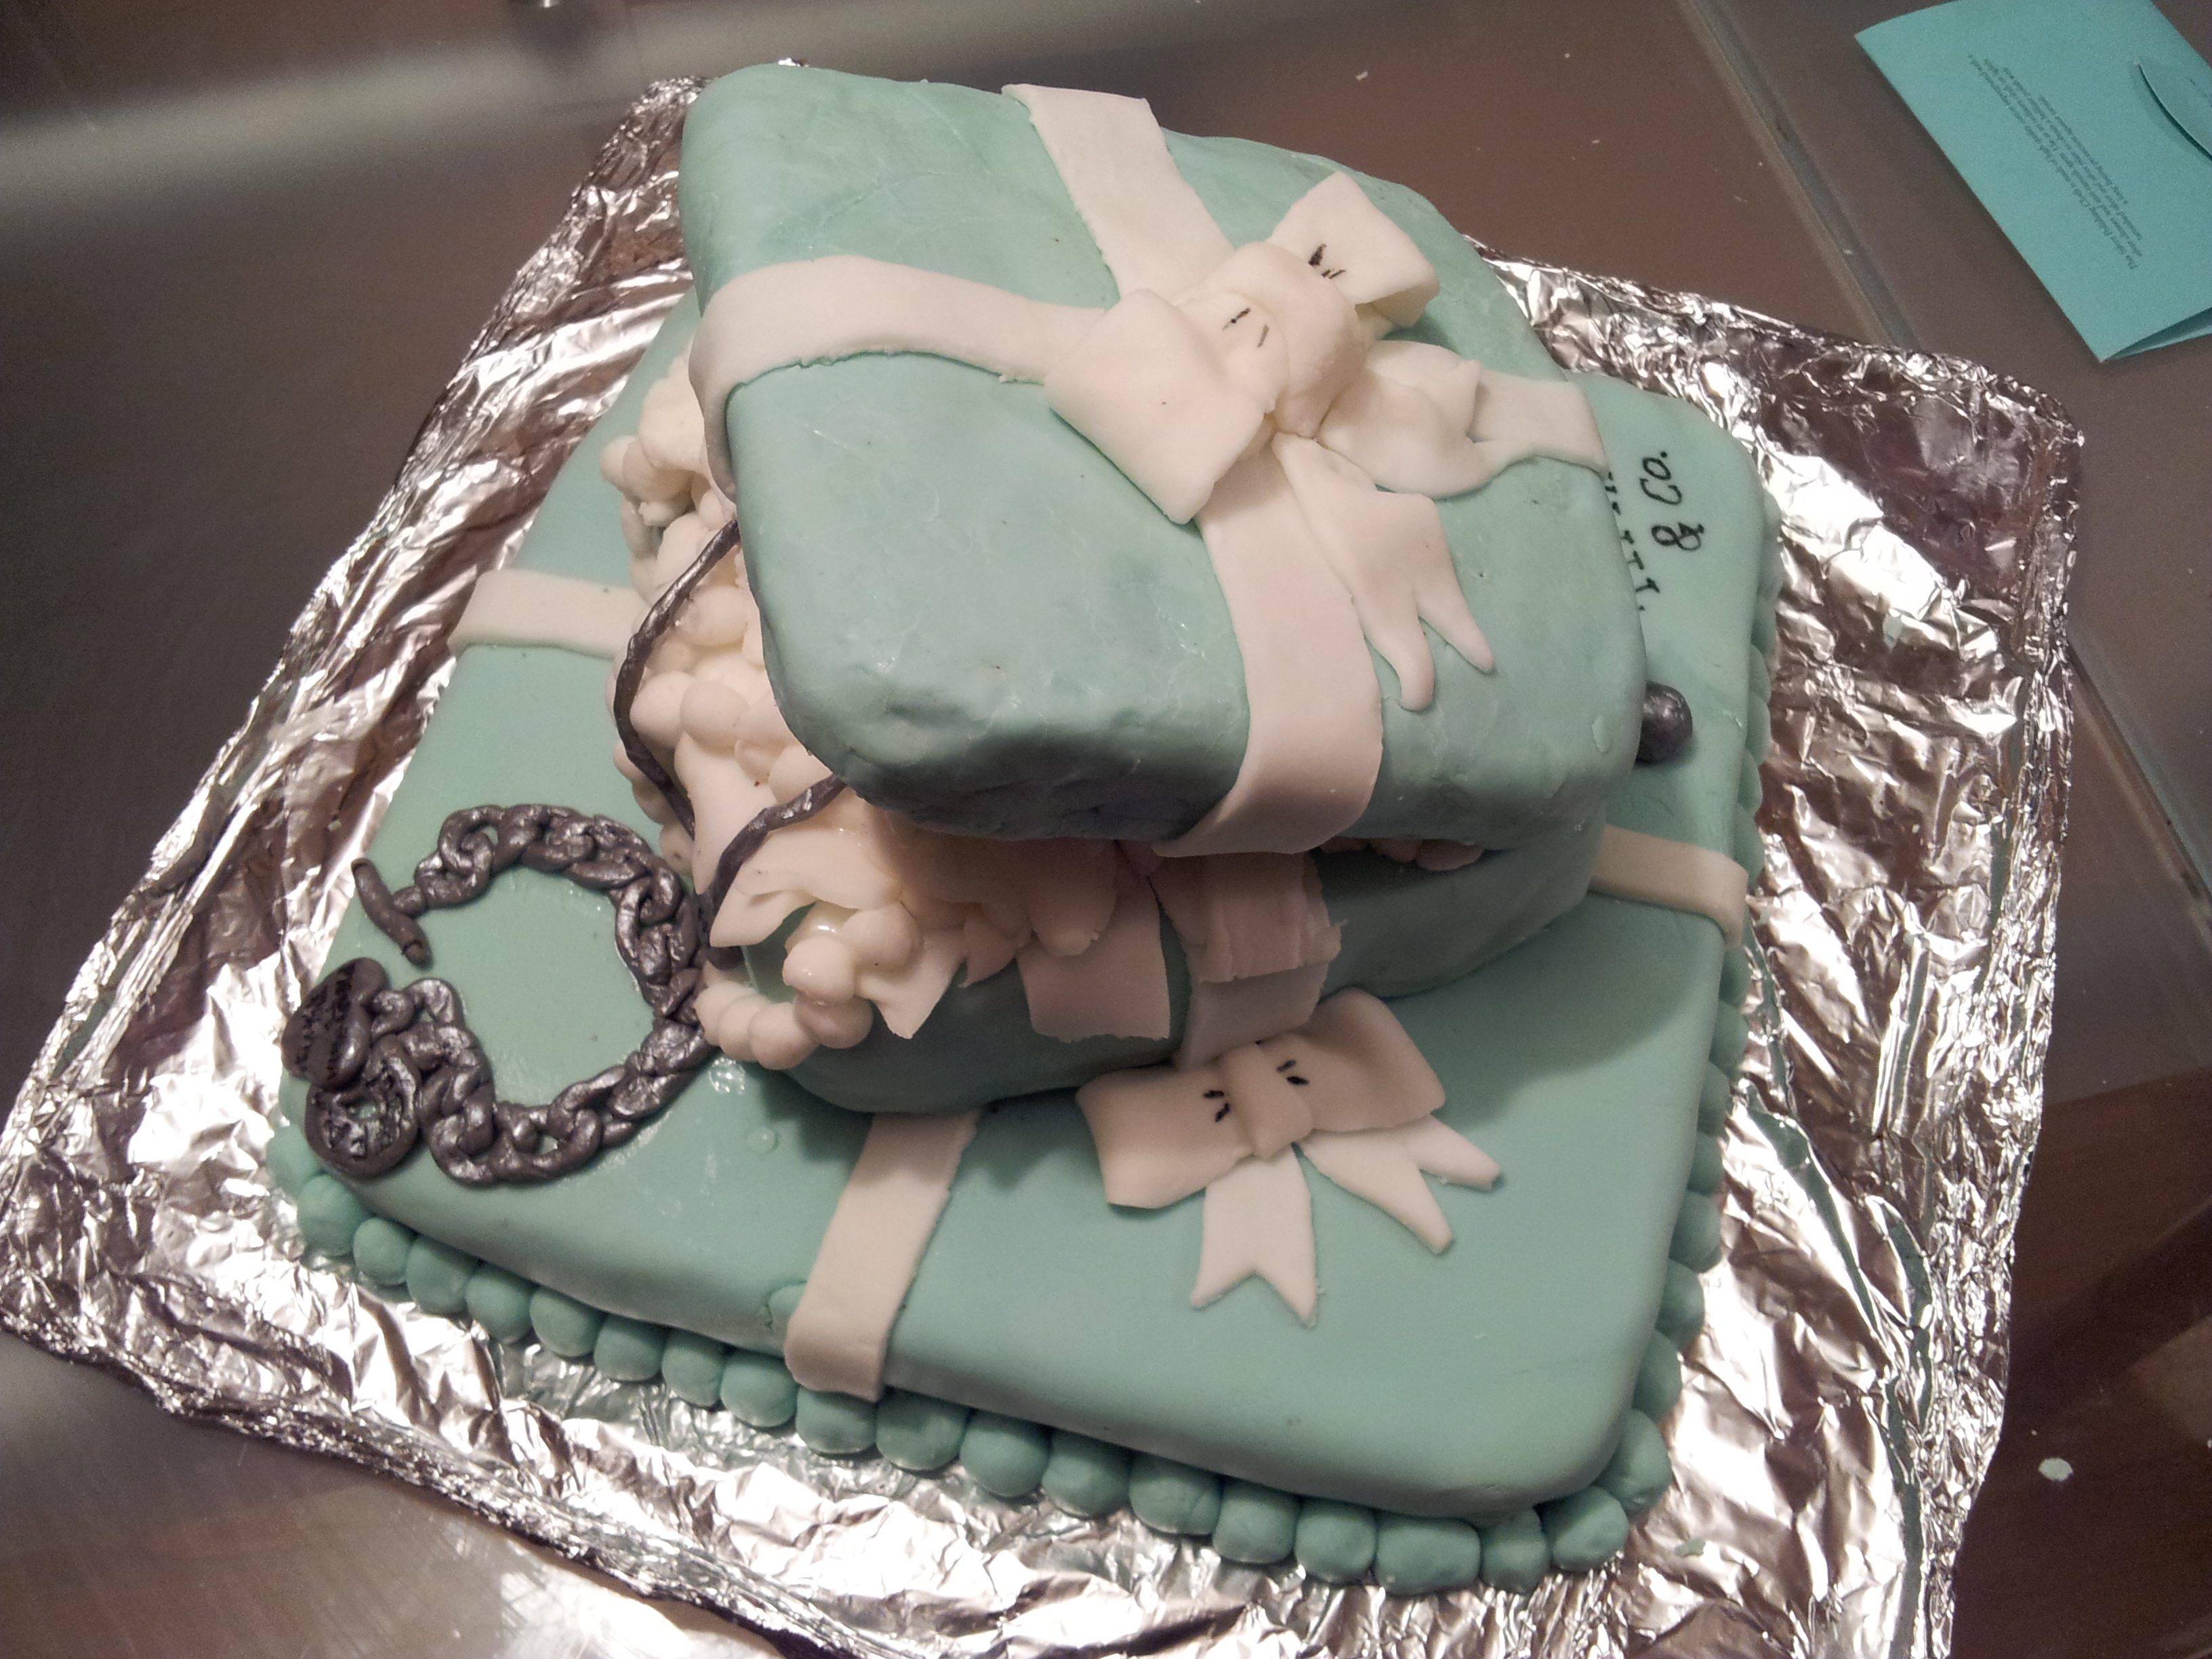
Here are some more pictures for you to have a look at!!


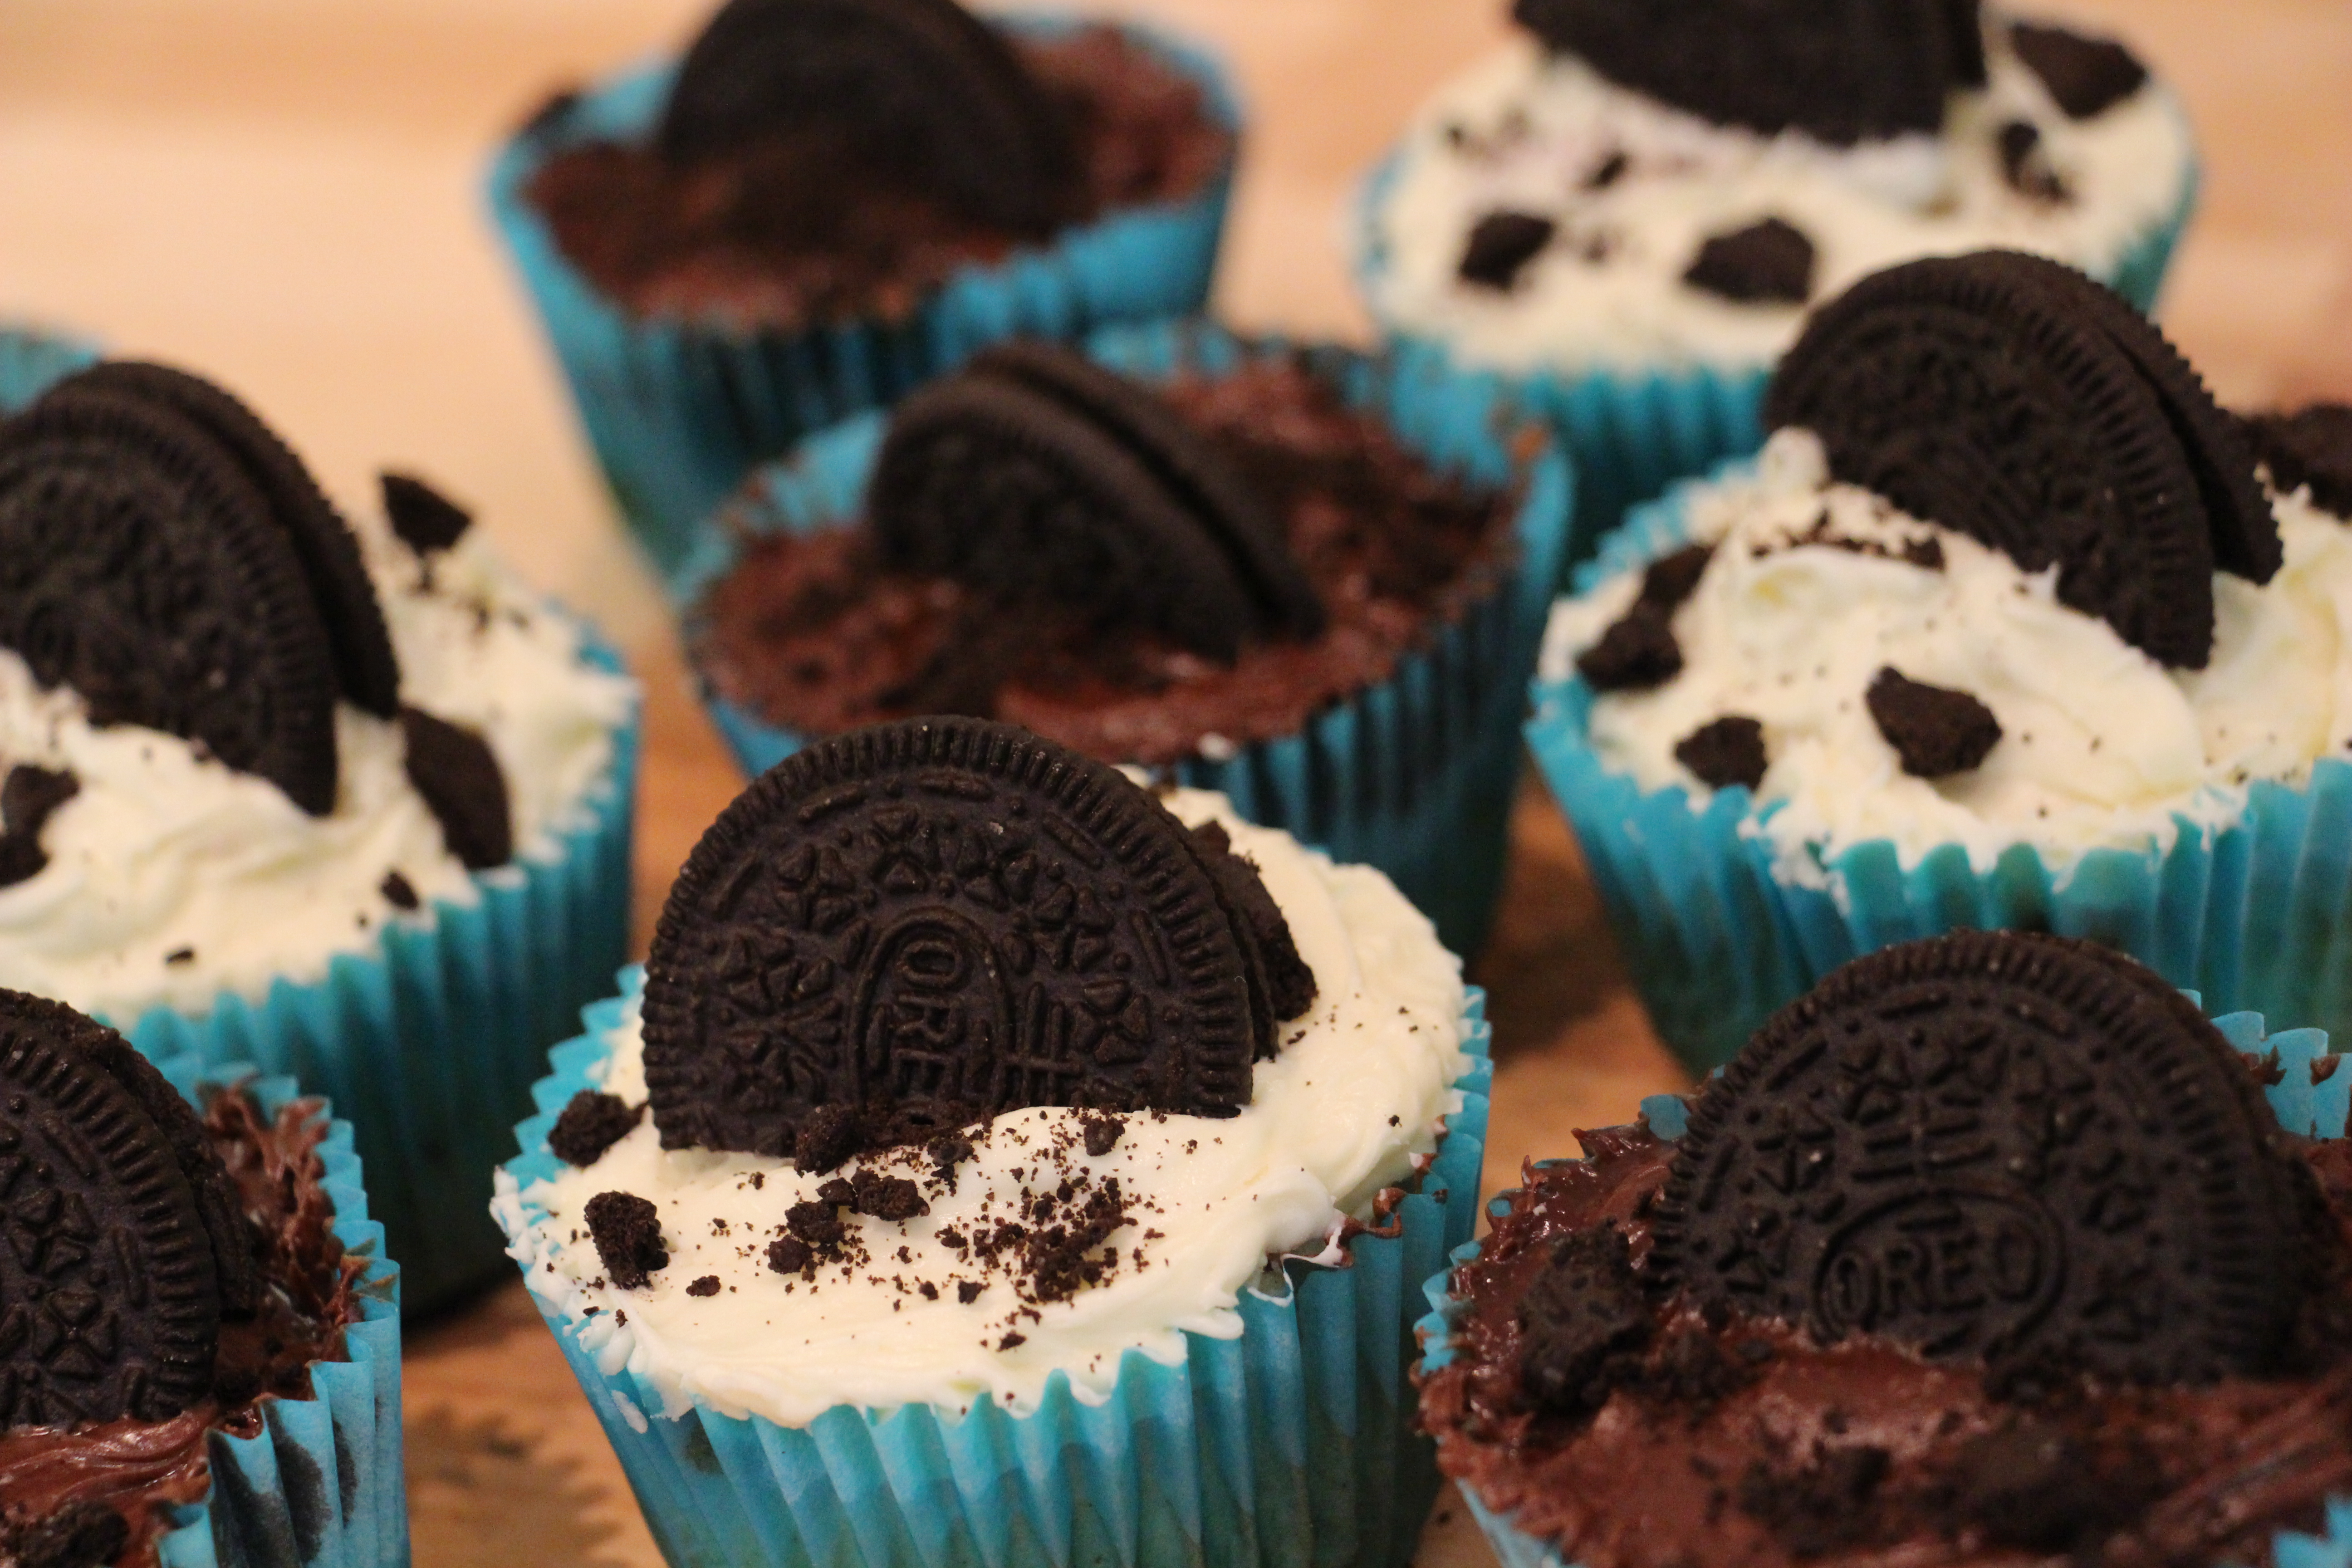
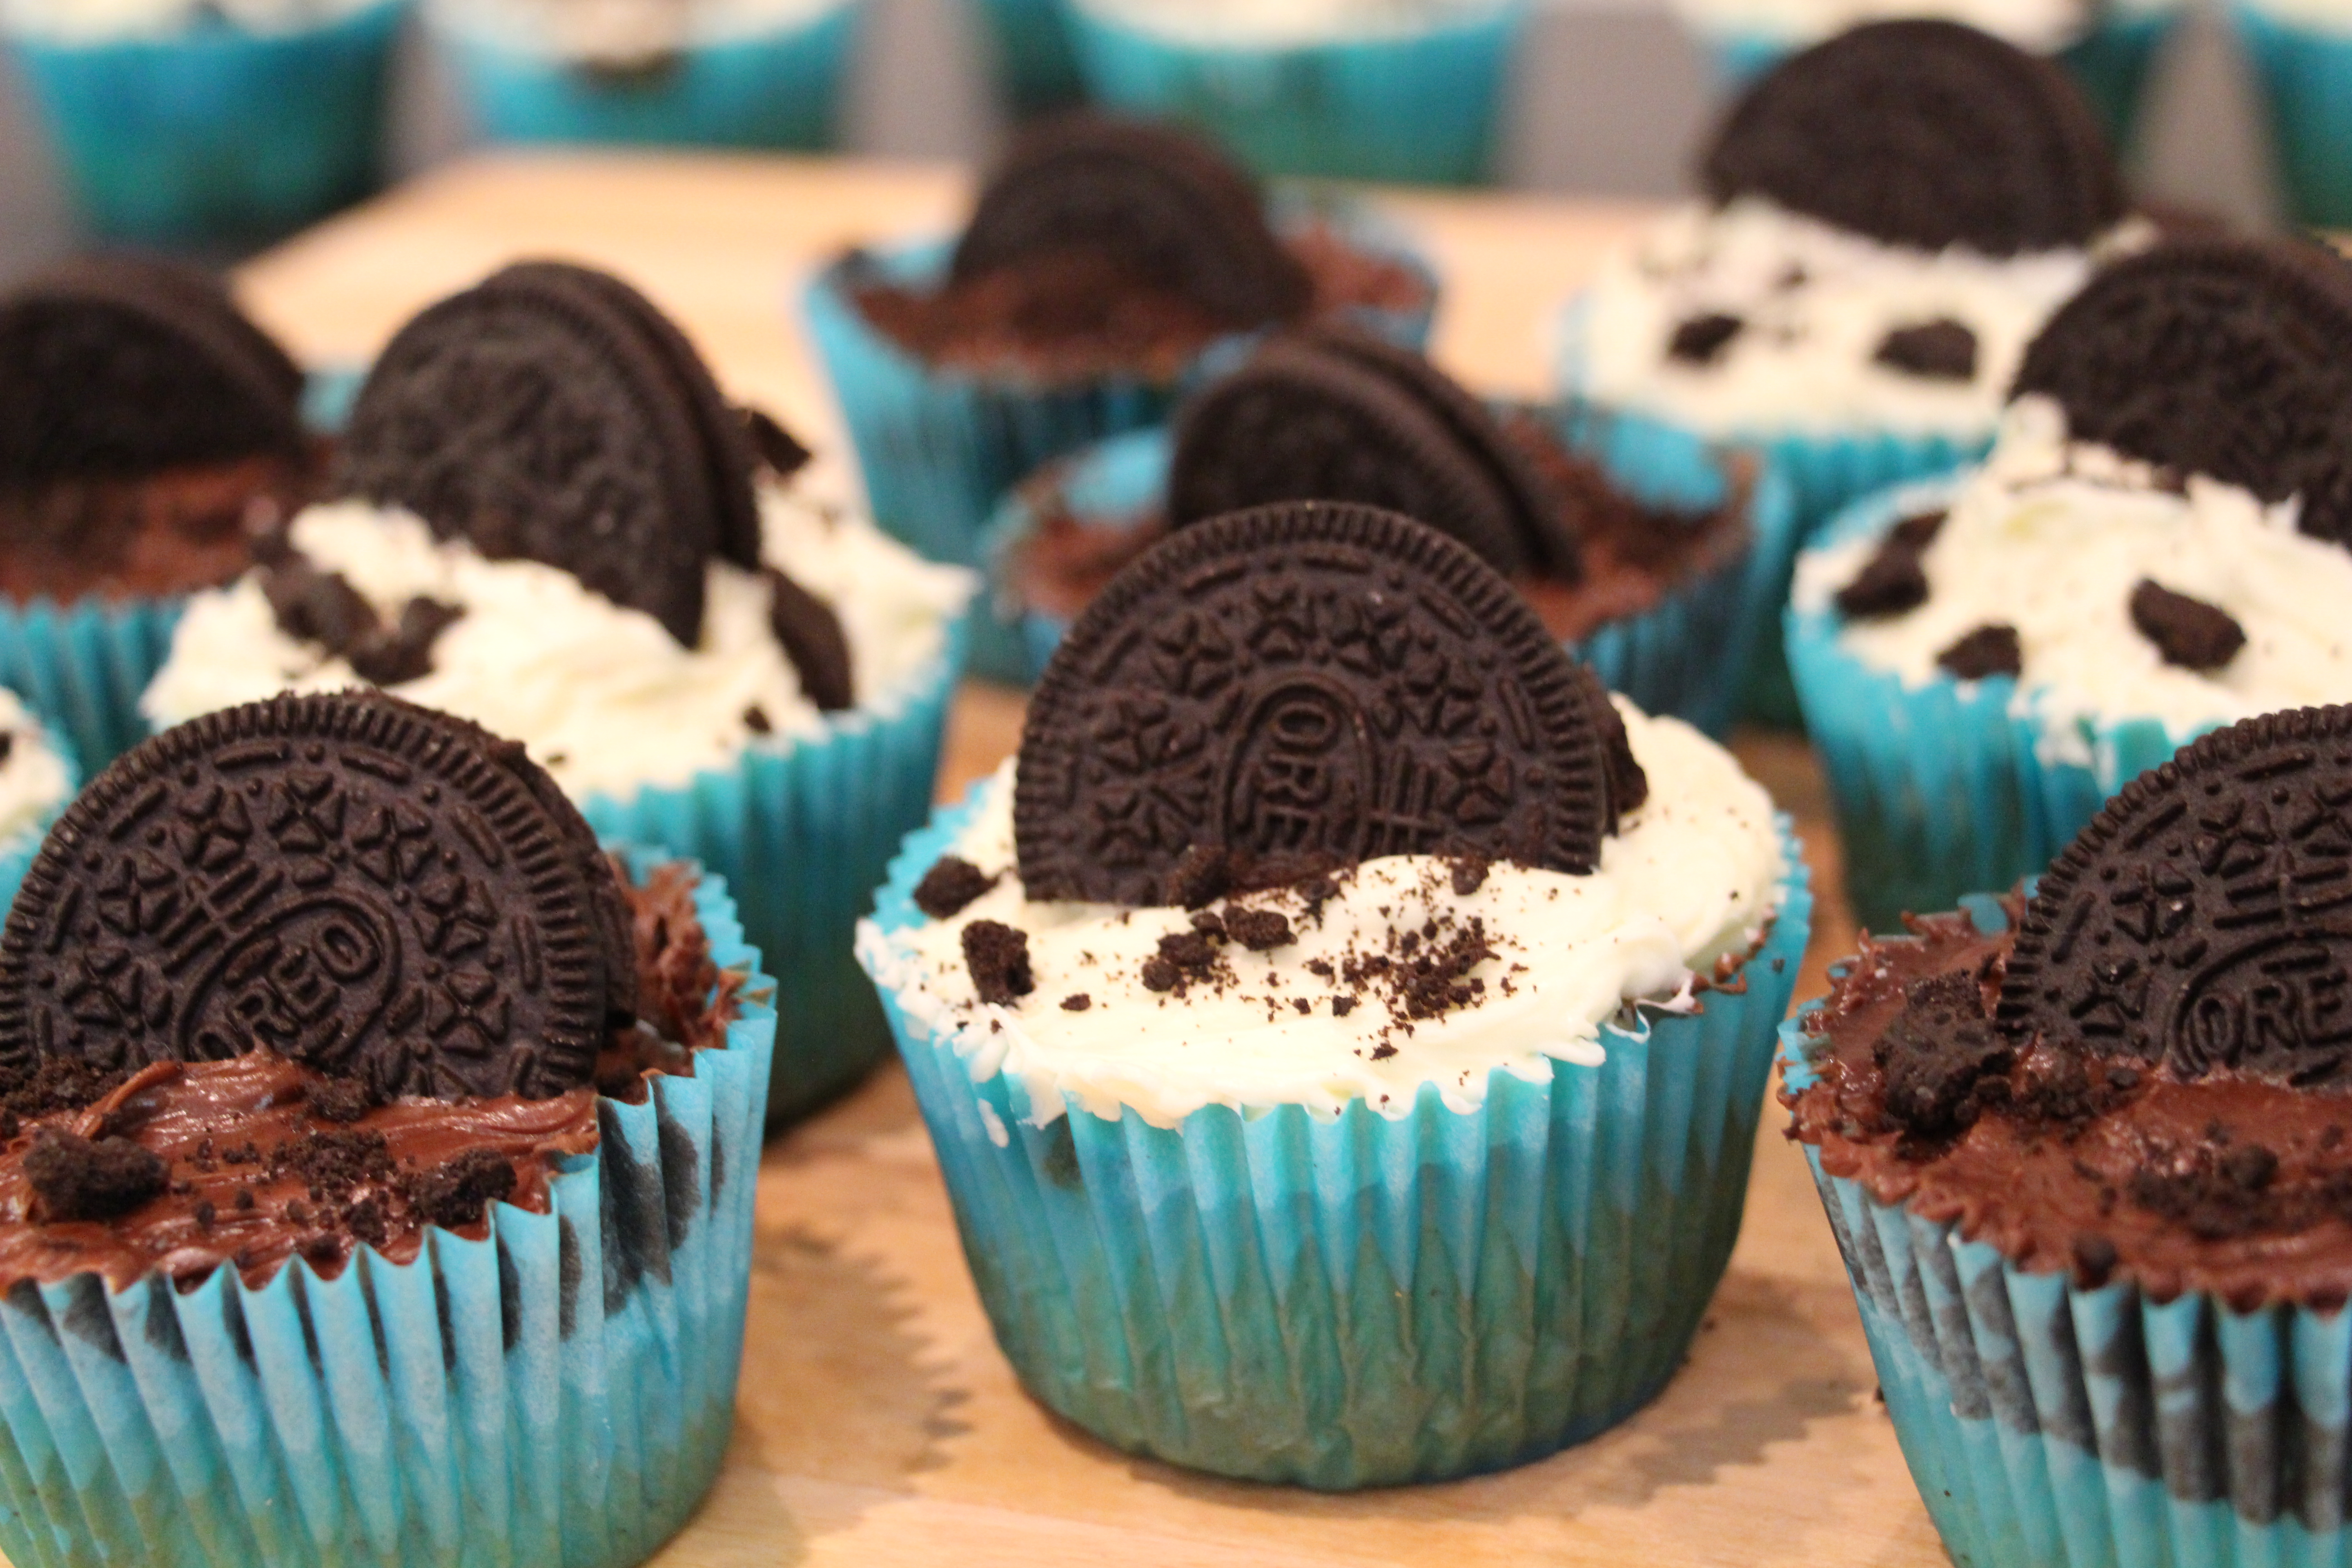
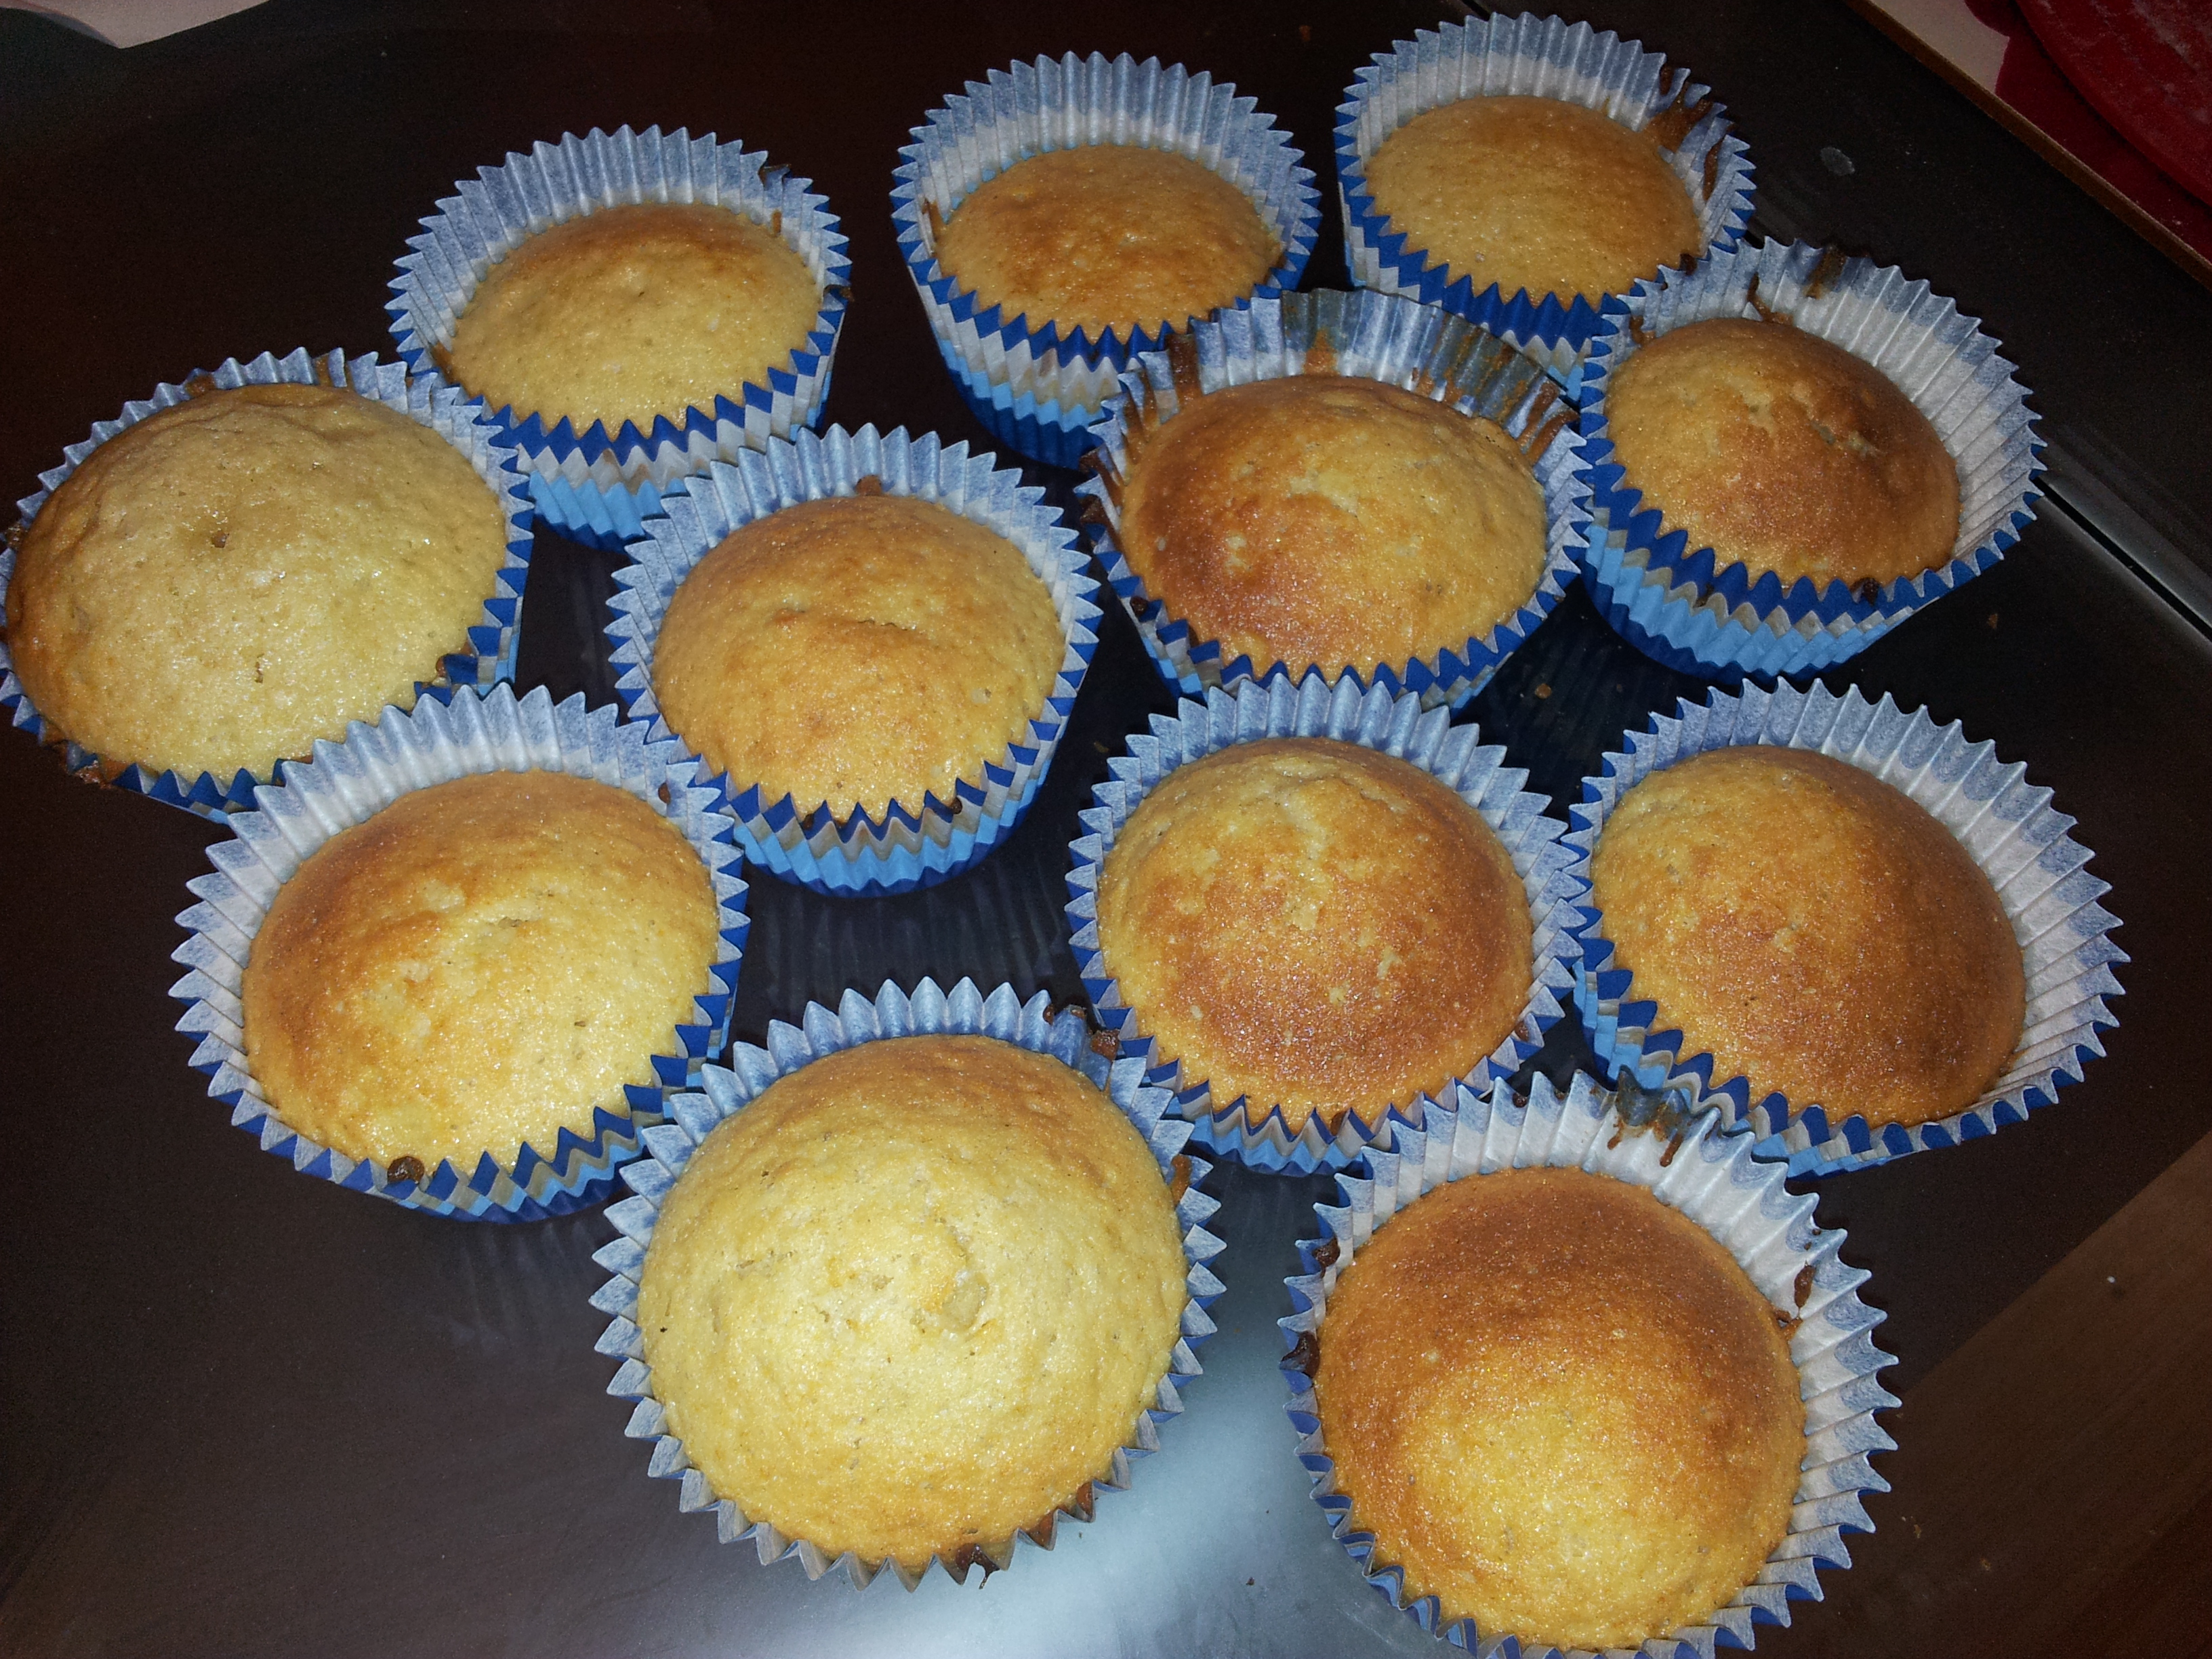
I saw these on a few cooking websites so thought I’d try these for myself and maybe give them a little twist.
These are pretty easy to make and I’l go through in a step by step basis.
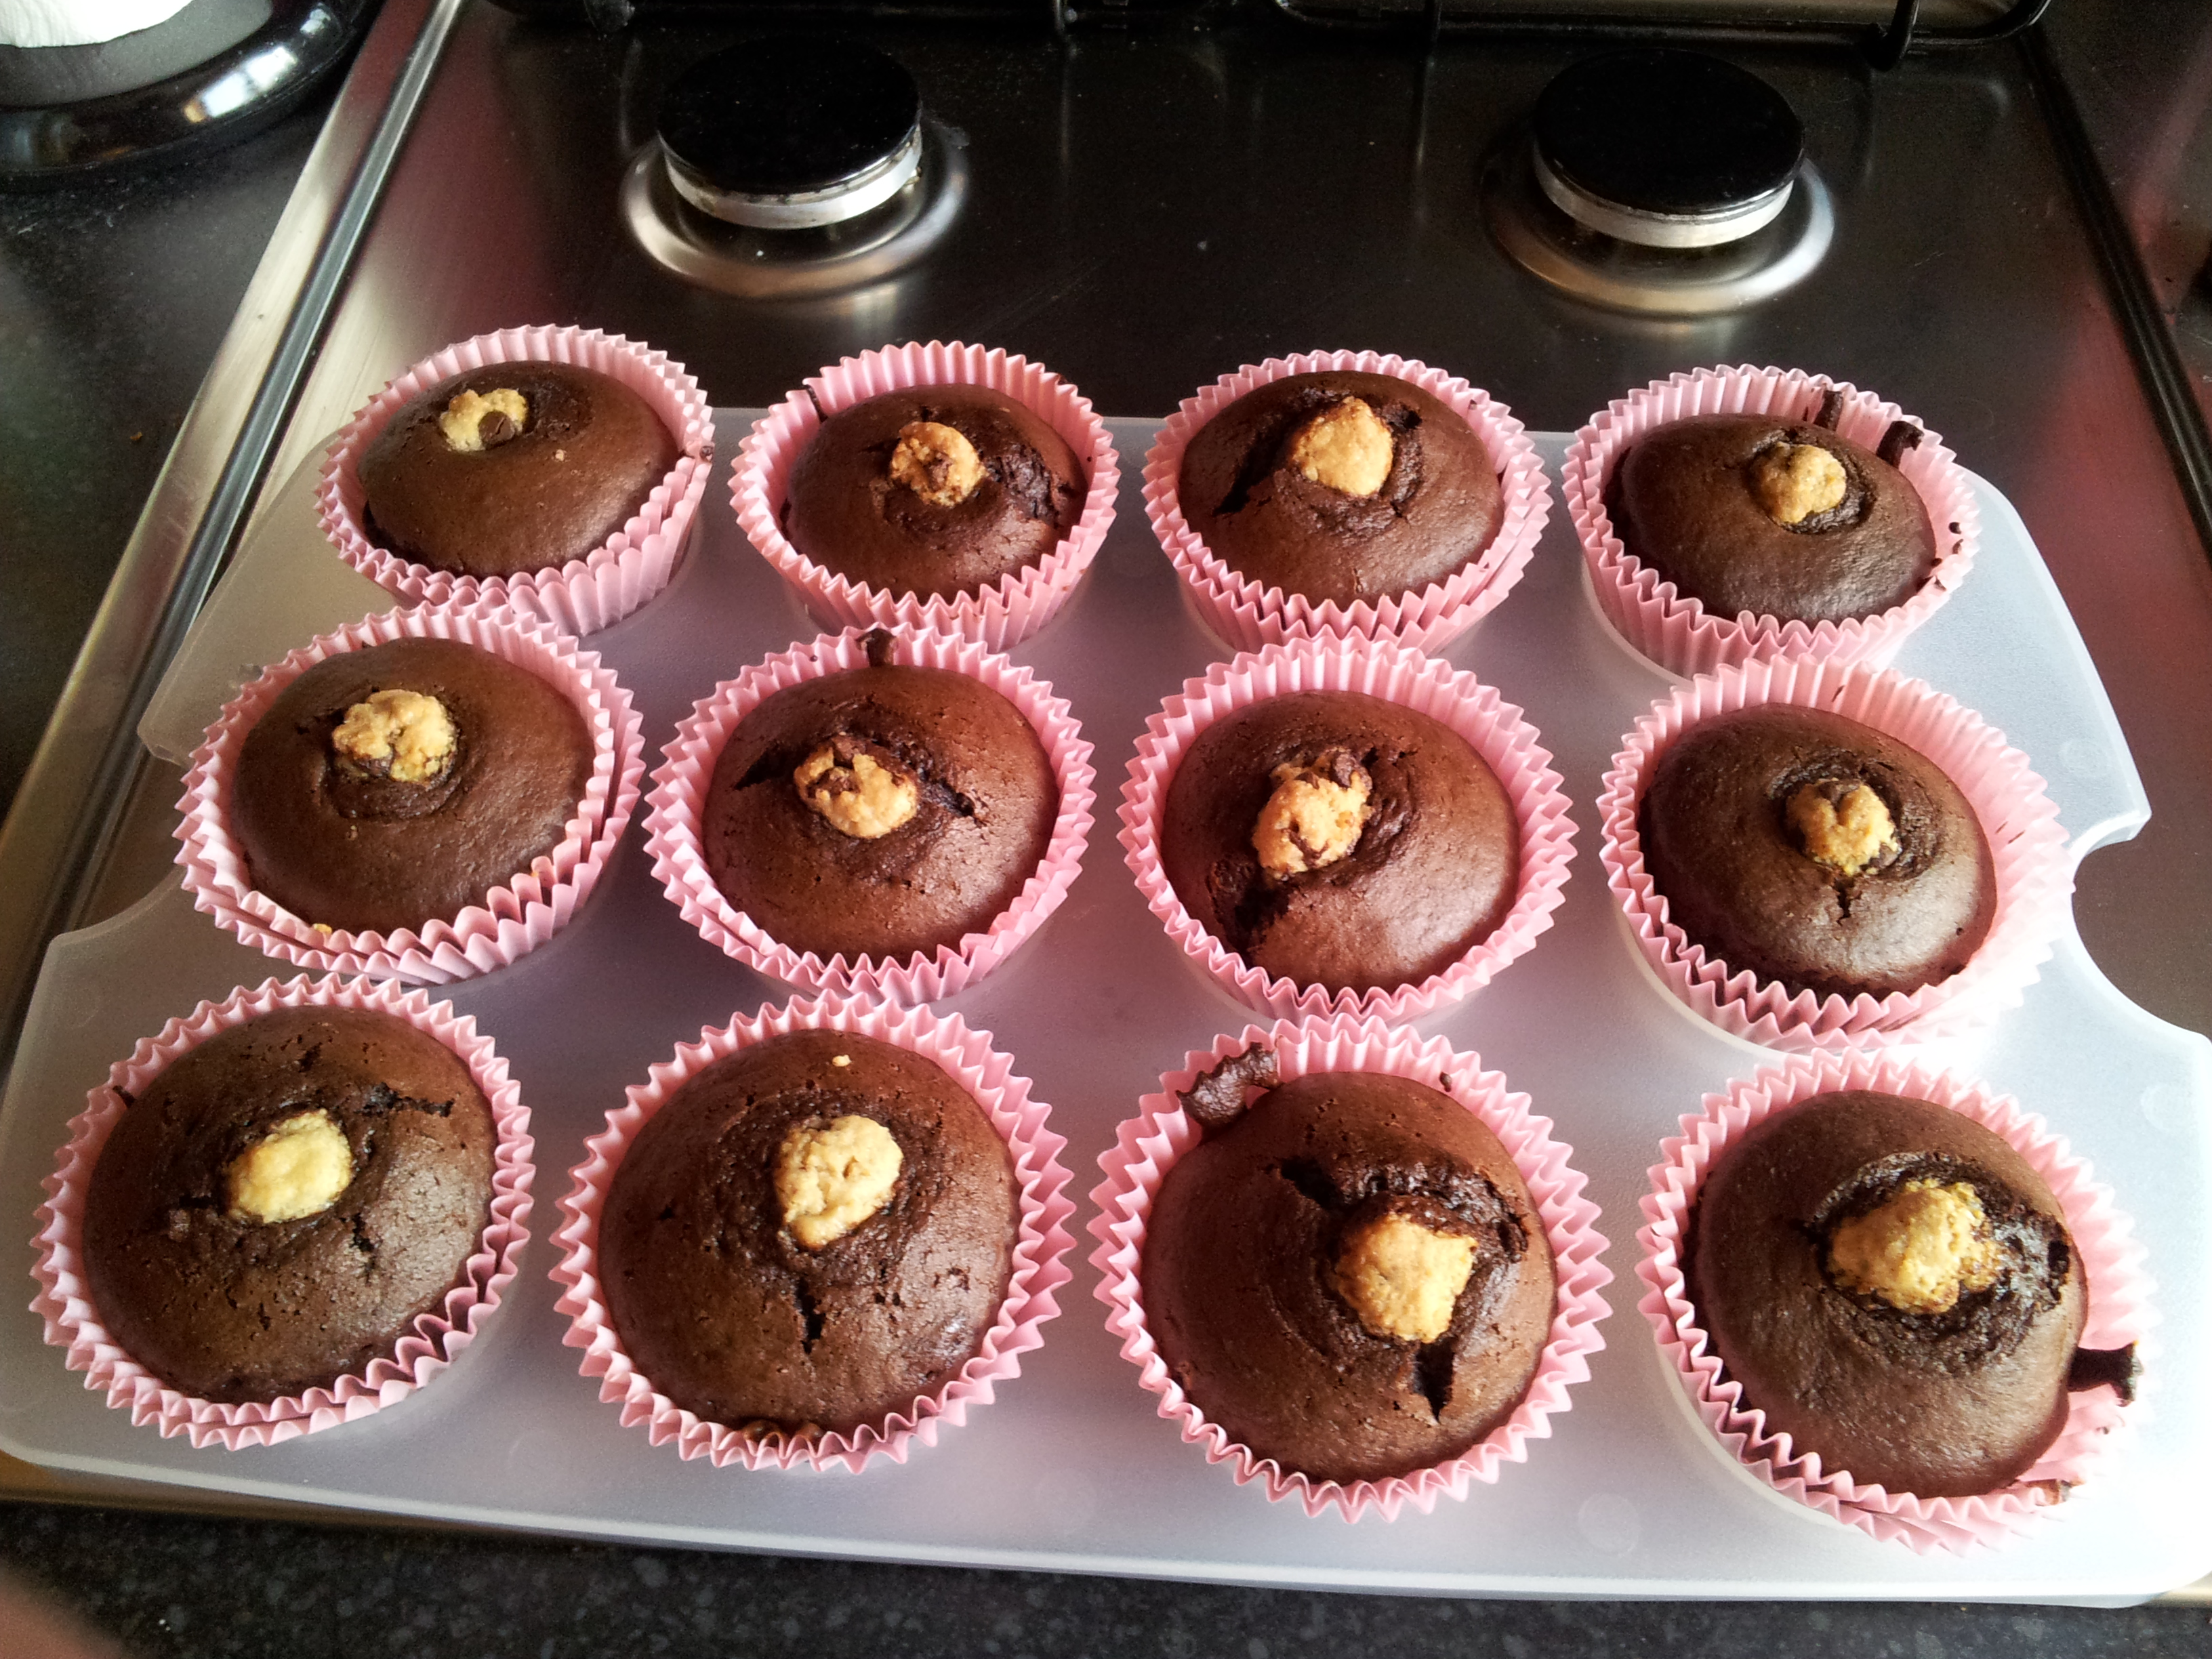
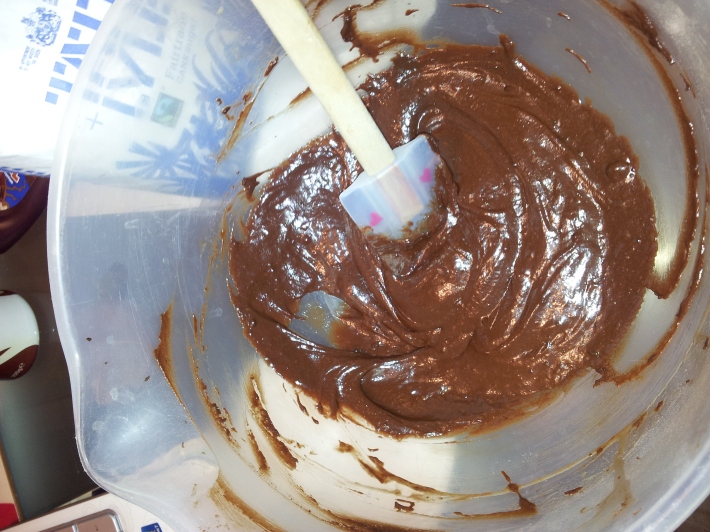
Brownie Cupcakes
Now I’ve made 2 types of these. Chocolate brownie cupcakes and White Chocolate Brownie cupcakes. The ingredients are exactly the same except you substitute cocoa powder with white chocolate powder (I used hot chocolate mix which actually worked really well!)
Ingredients
Directions

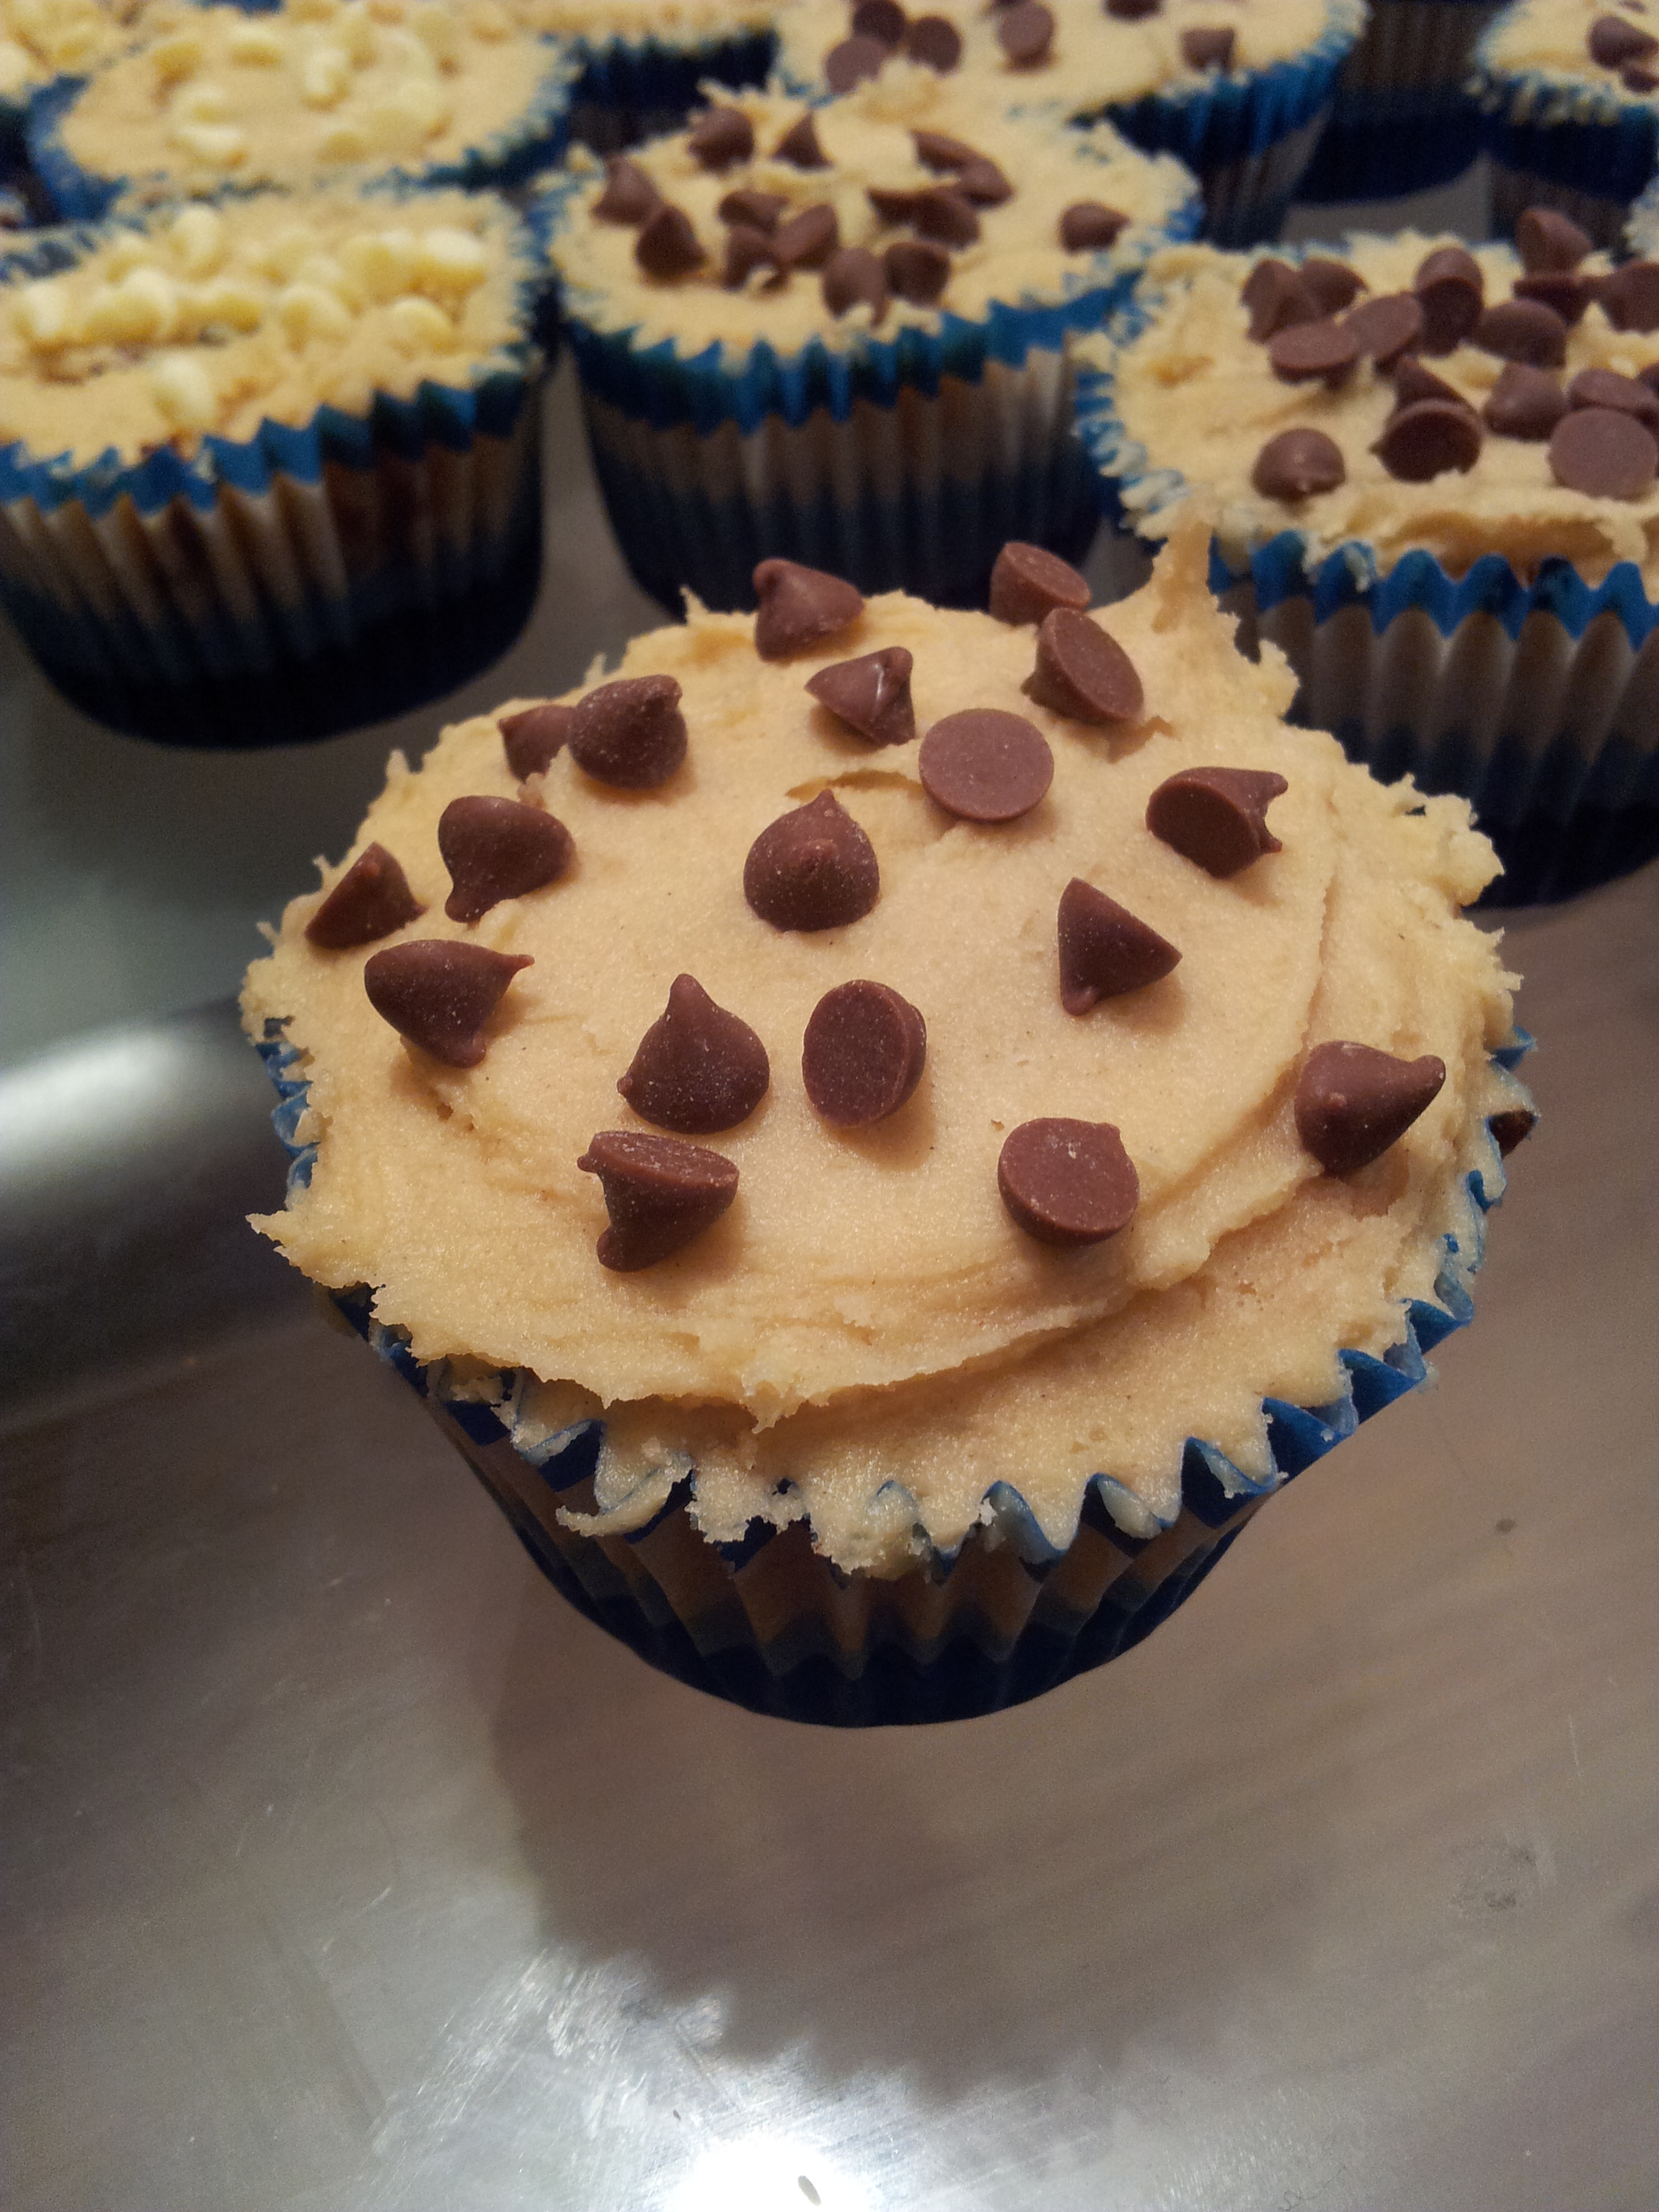
Cookie Dough Frosting
Directions
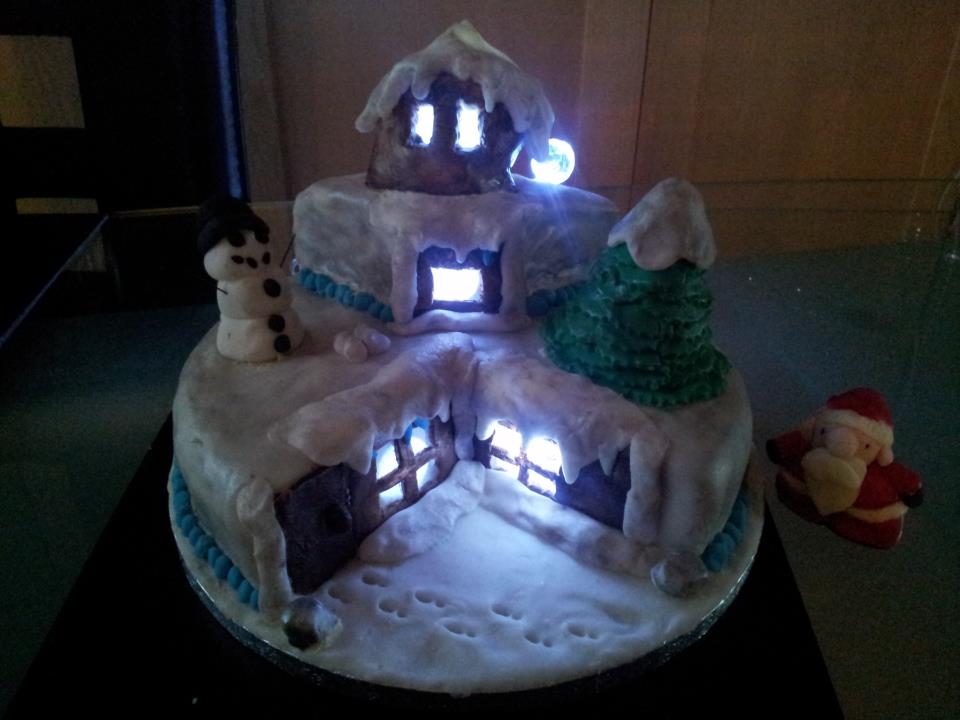
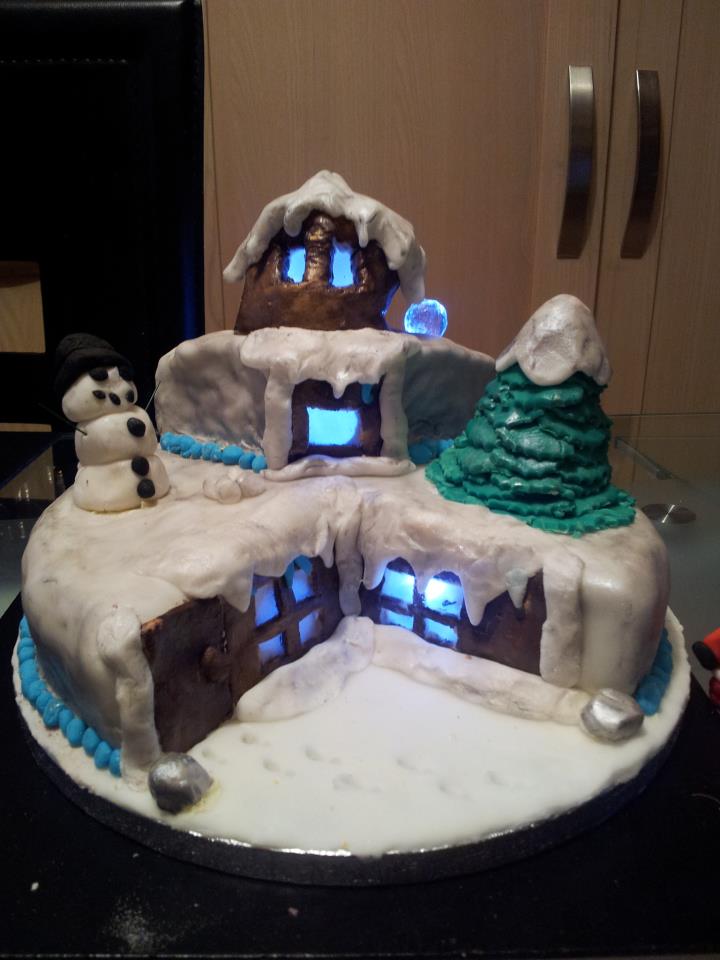
To challenge myself even more, i thought it would be cool to make a winter wonderland cake… with lights!!
It’s actually quite small but due to all the detail, it actually took me a very long time. I used Rice Paper for the windows so you couldn’t see the lights inside which were wireless.
As a celebration of the end of the year, I decided to create some Christmas Cupcakes which had a little cake topper twist. All had unique tops for the different personalities of the team!

My client for this cake was a girly girl who wanted something sweet and delicious to bring her birthday in. She also wanted it to look slightly different than a normal cake so after our consultation we decided that a two layer cake with cake balls all around would be perfect for her.

